Picket Installation Guide
Your day in order
- 1
Load the truck. Tick everything off in the Setup checklist.
- 2
Start Aurora. Choose Installation, your consumables and your route, then tap START. Steps are in the Aurora guide.
- 3
Drive to your first address. Tap NAV for directions.
- 4
Work the route in order. Follow the route line on the map, property by property.
- 5
At each property: check it in Aurora, install, take the photo, then log it and tap UPDATE. The steps are under “Install step by step” below, and the logging screens are in the Aurora guide.
- 6
End of the day. Tap LEAVE, drive back to the yard and restock the truck.
At a glance
Branded picket
Marks the driveway
Shared: 1 · Detached: 2
Fiber rod
Interlock sticking out, obstacles
Shared: up to 2 · Detached: up to 3
Non-branded picket
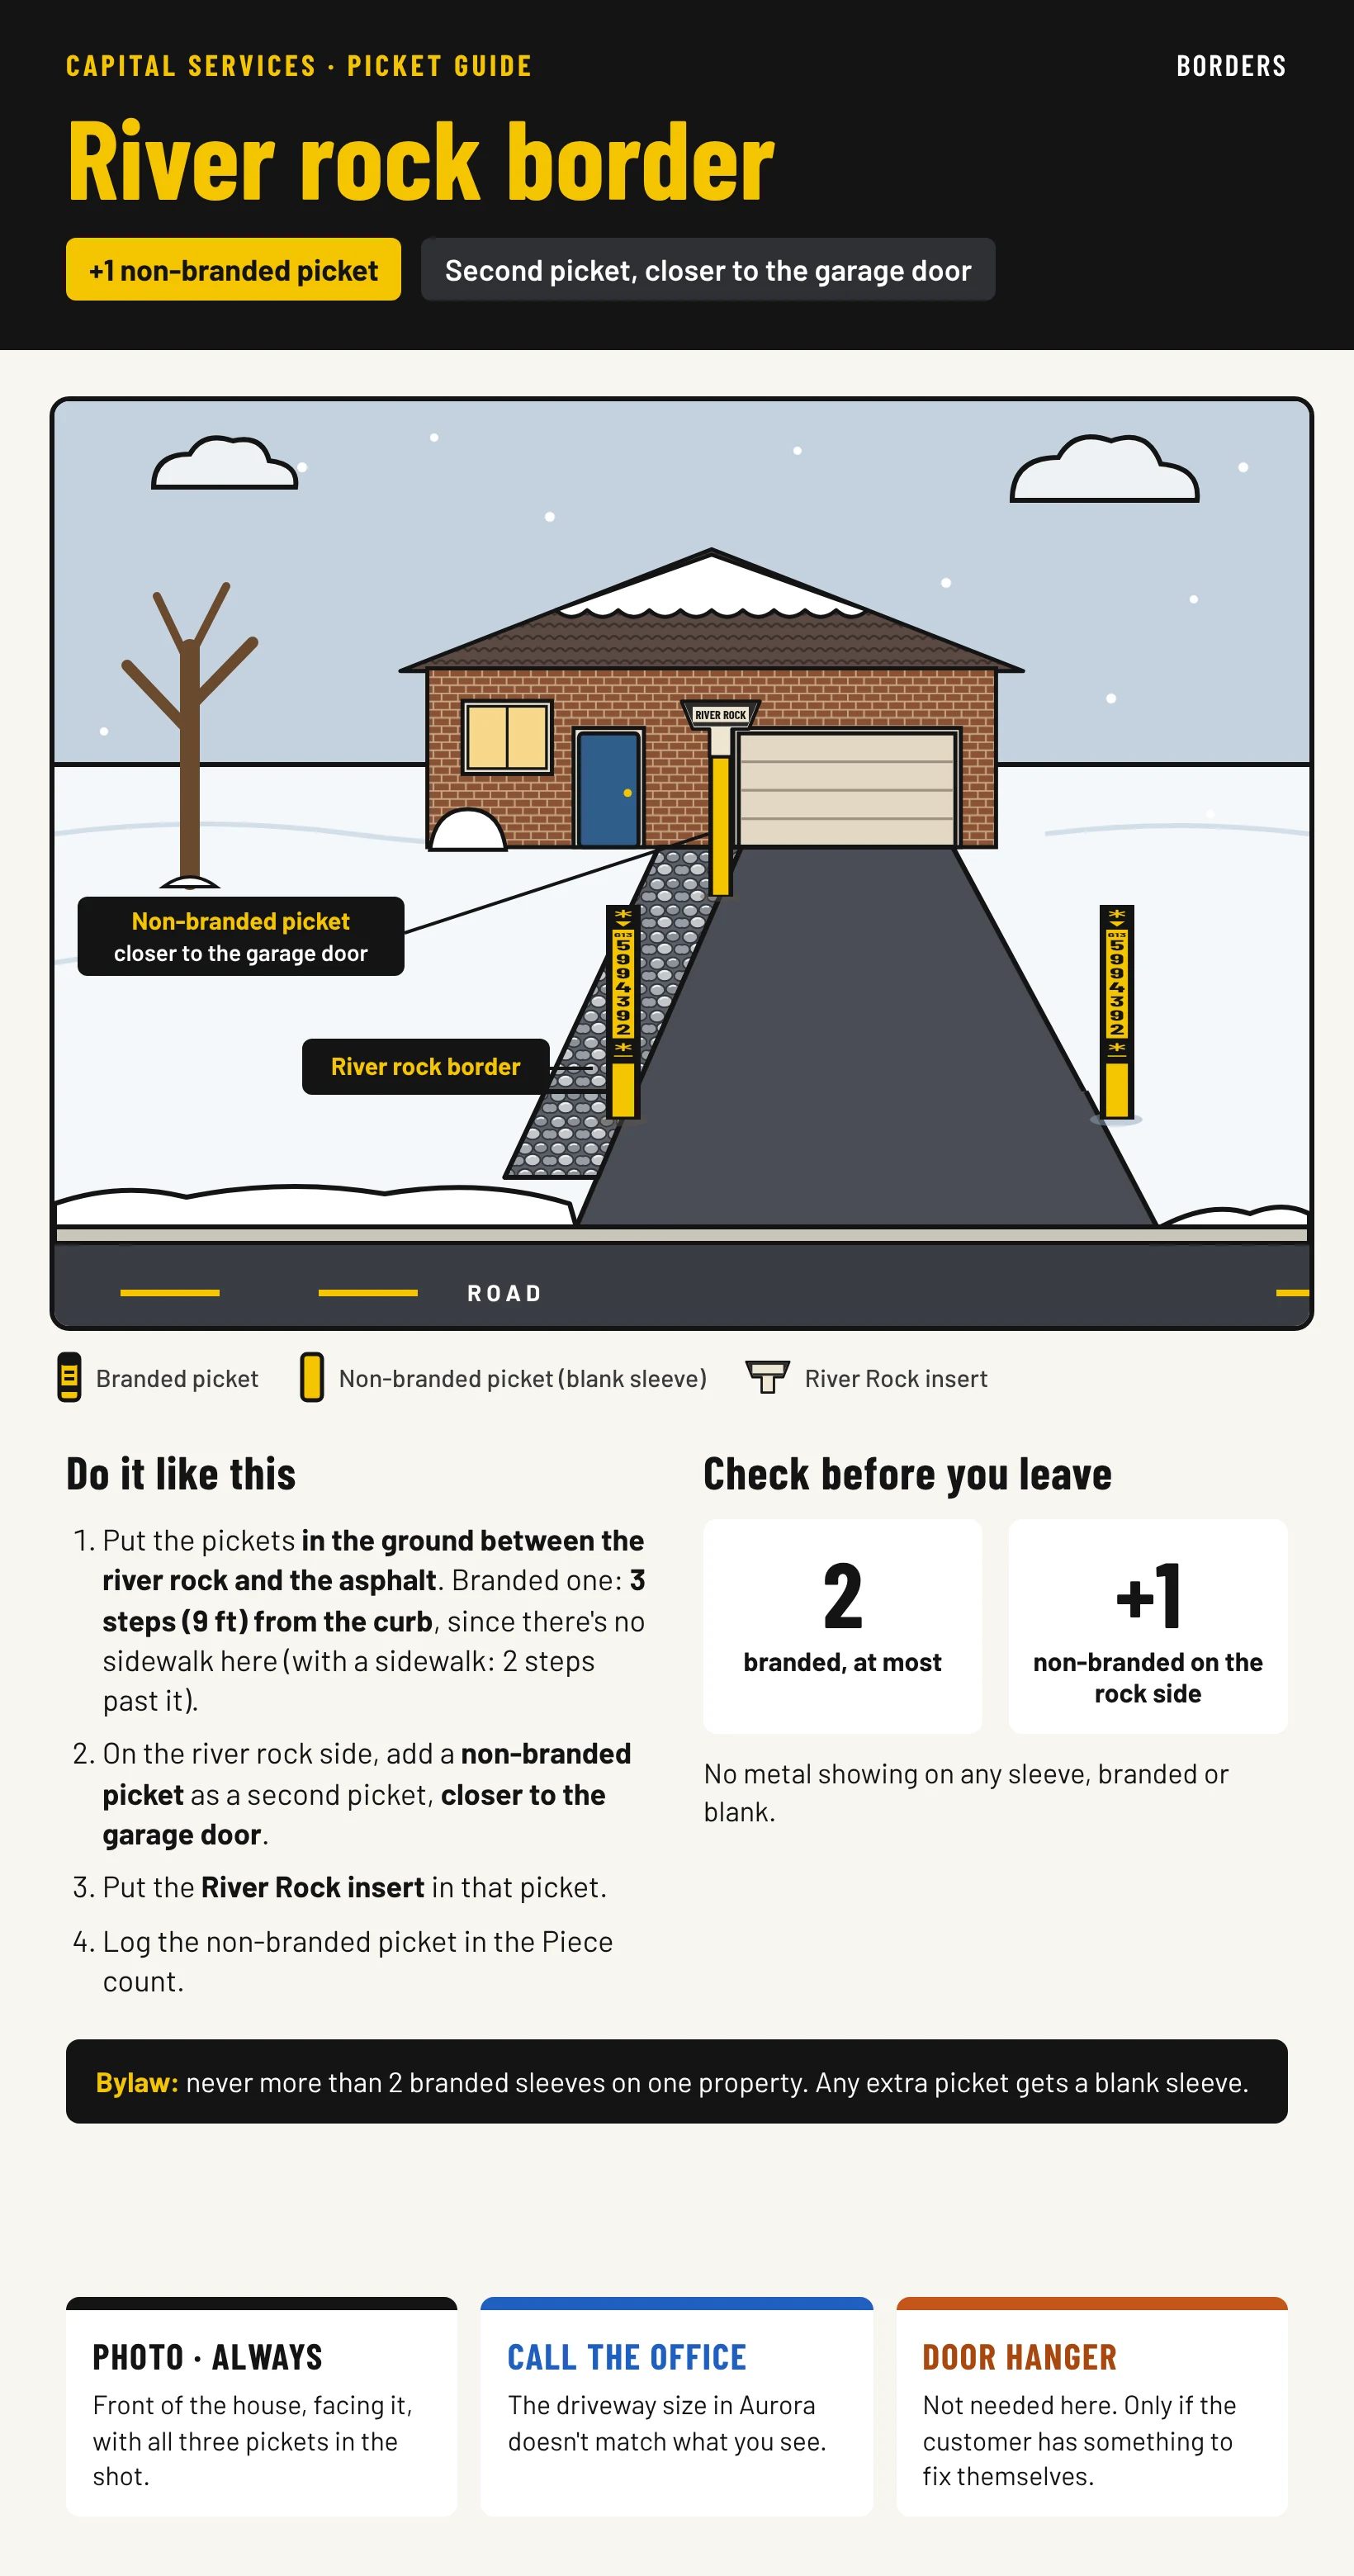
River rock border
Second picket, closer to the garage door
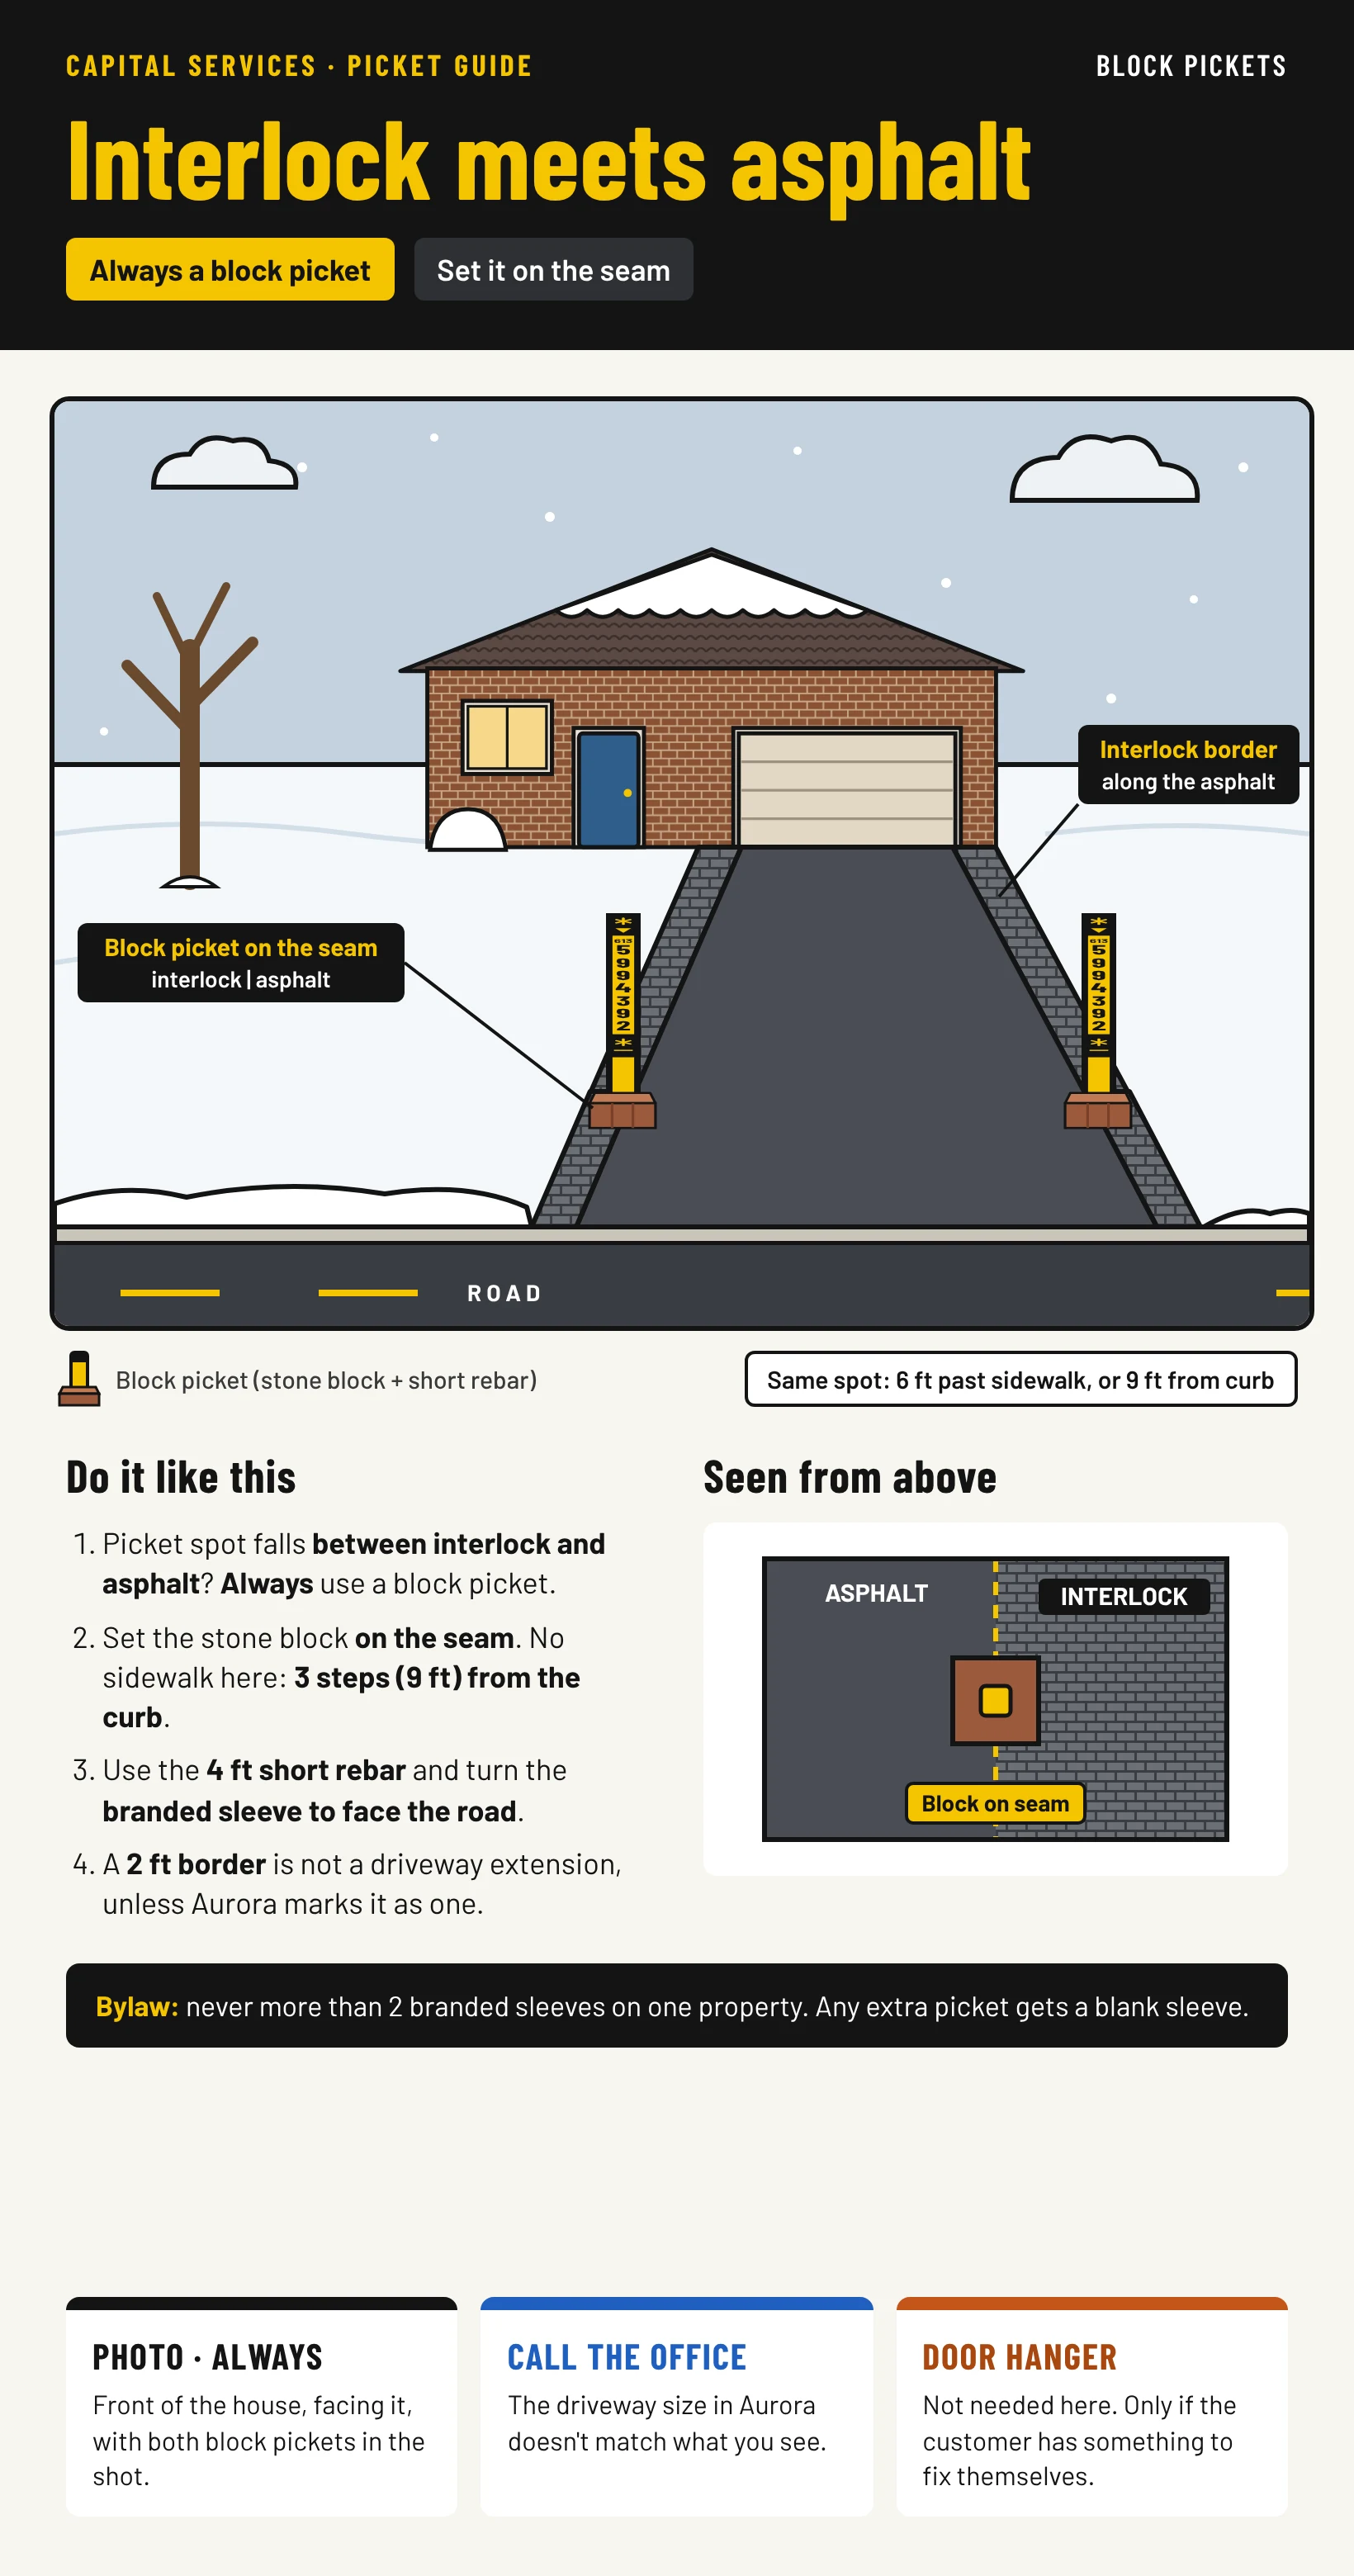
Stone block
Interlock-to-asphalt; rebar won't go in
Branded sleeve faces the road
Place each one 9 ft from the curb, 6 ft from the sidewalk, 6 in into the lawn
Each color is one kind of marker. The sections below give the detail for each.
Picket types by service tier
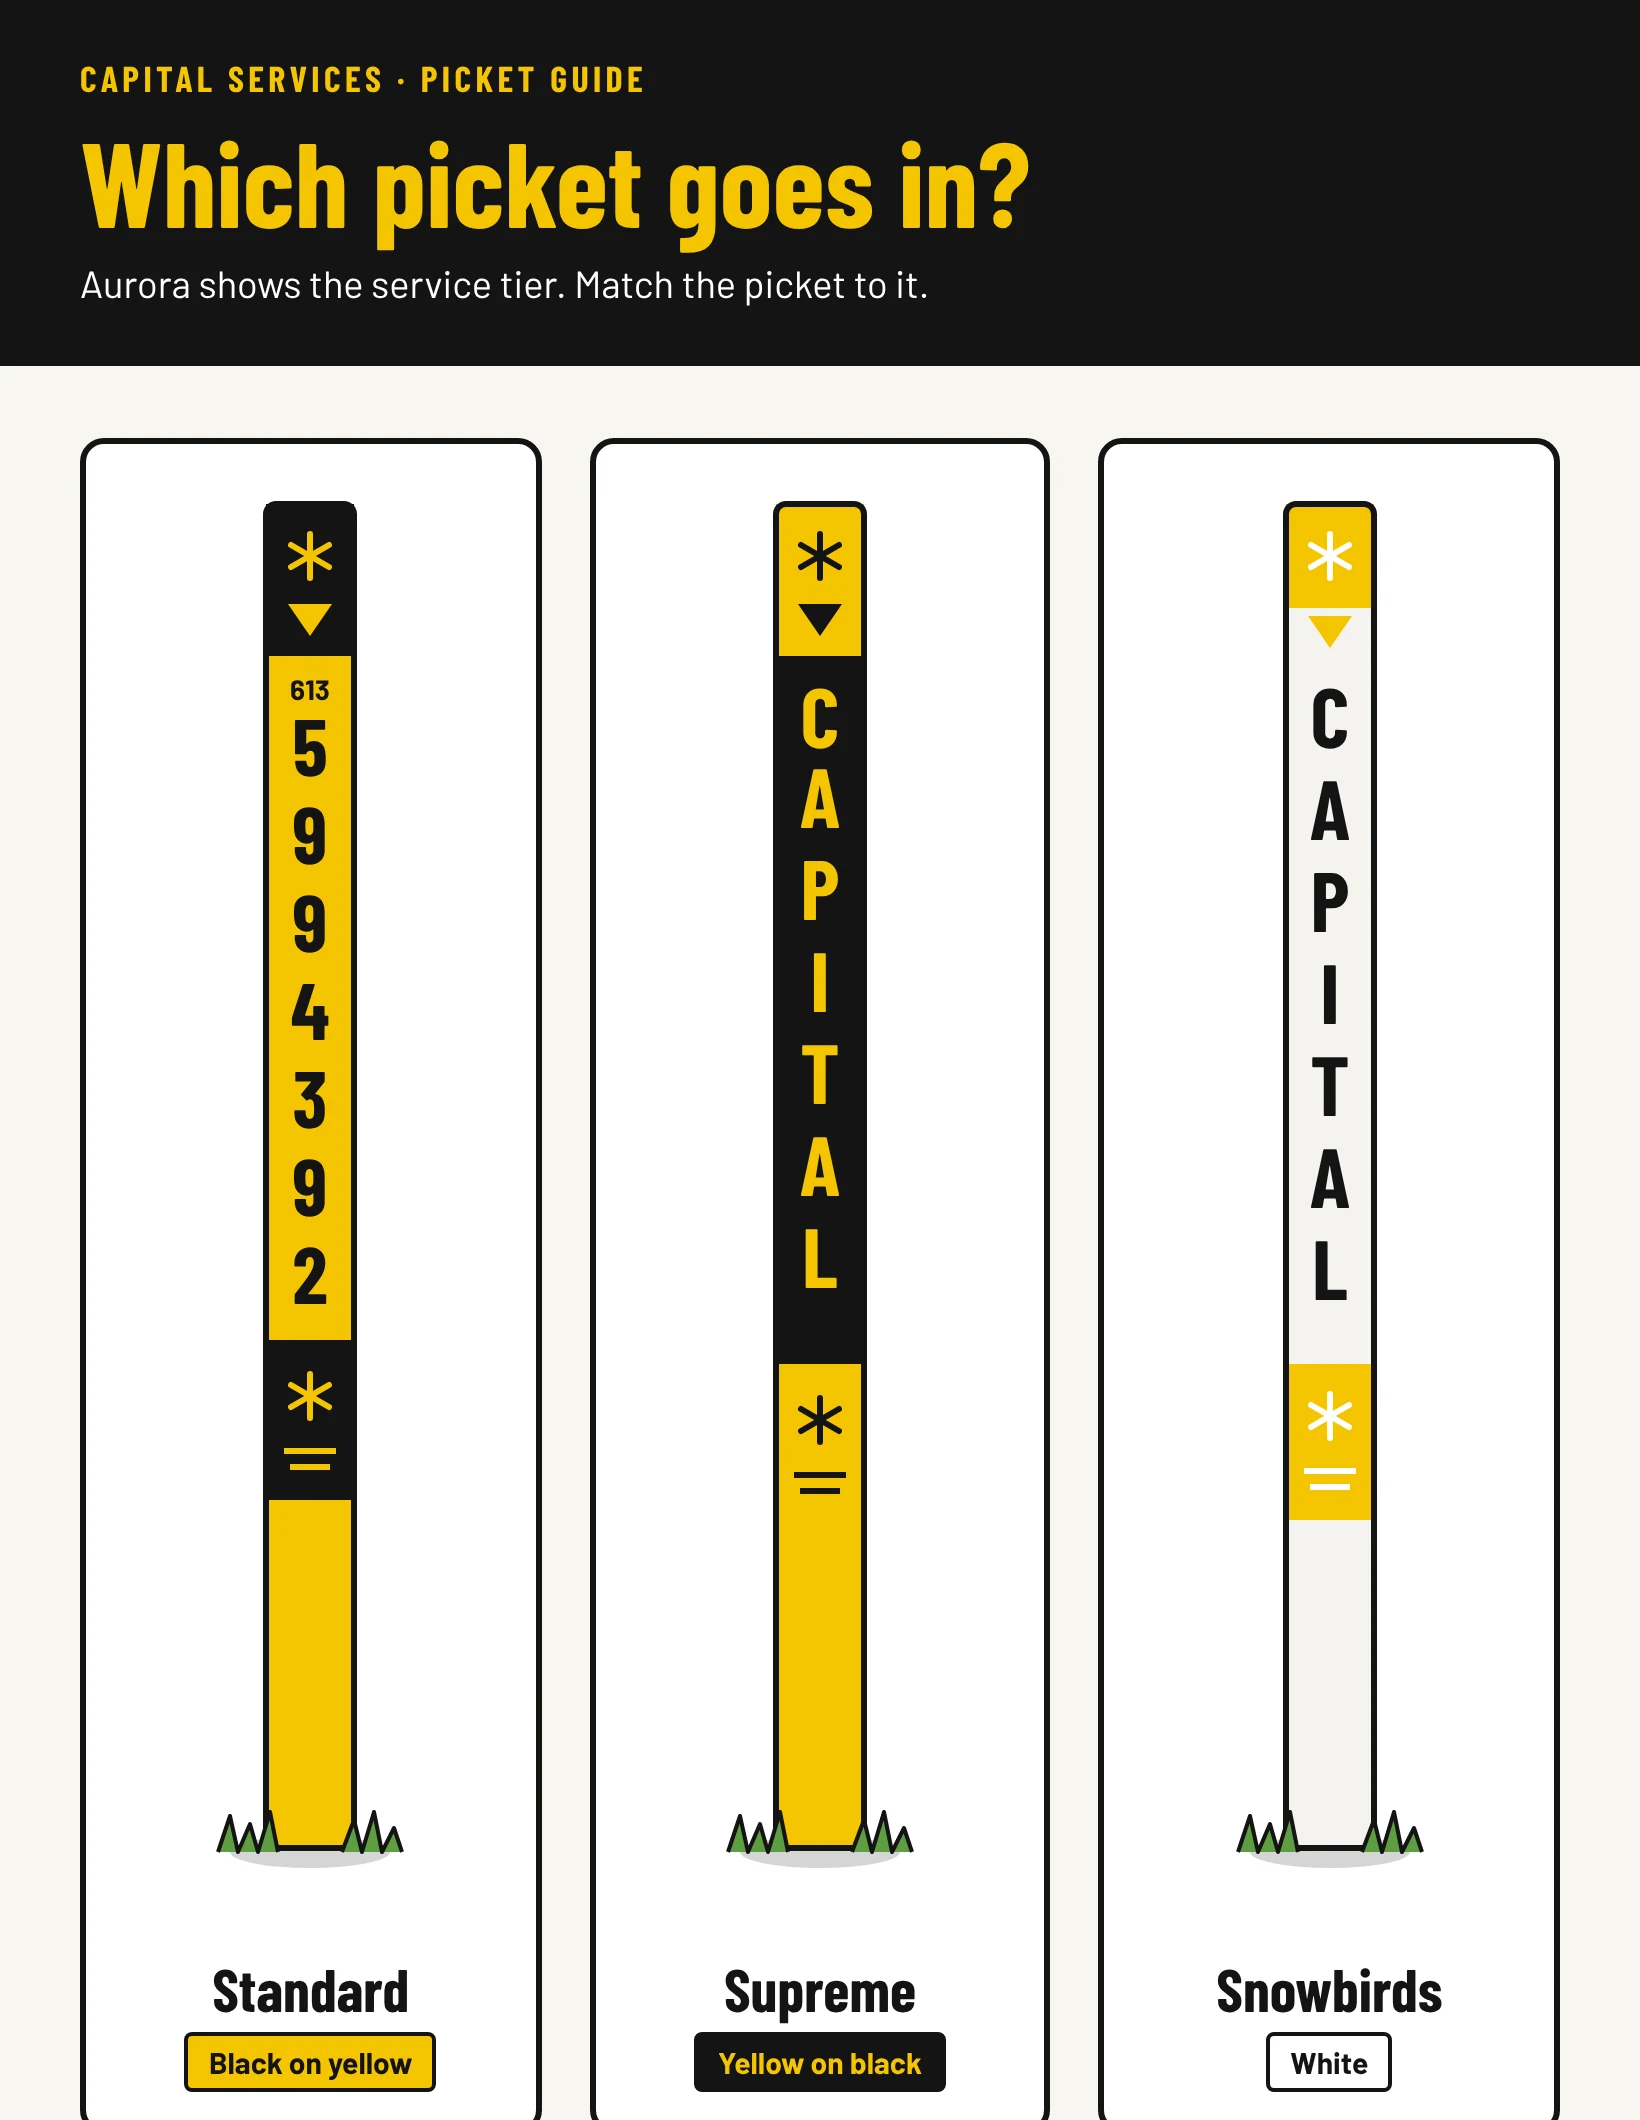
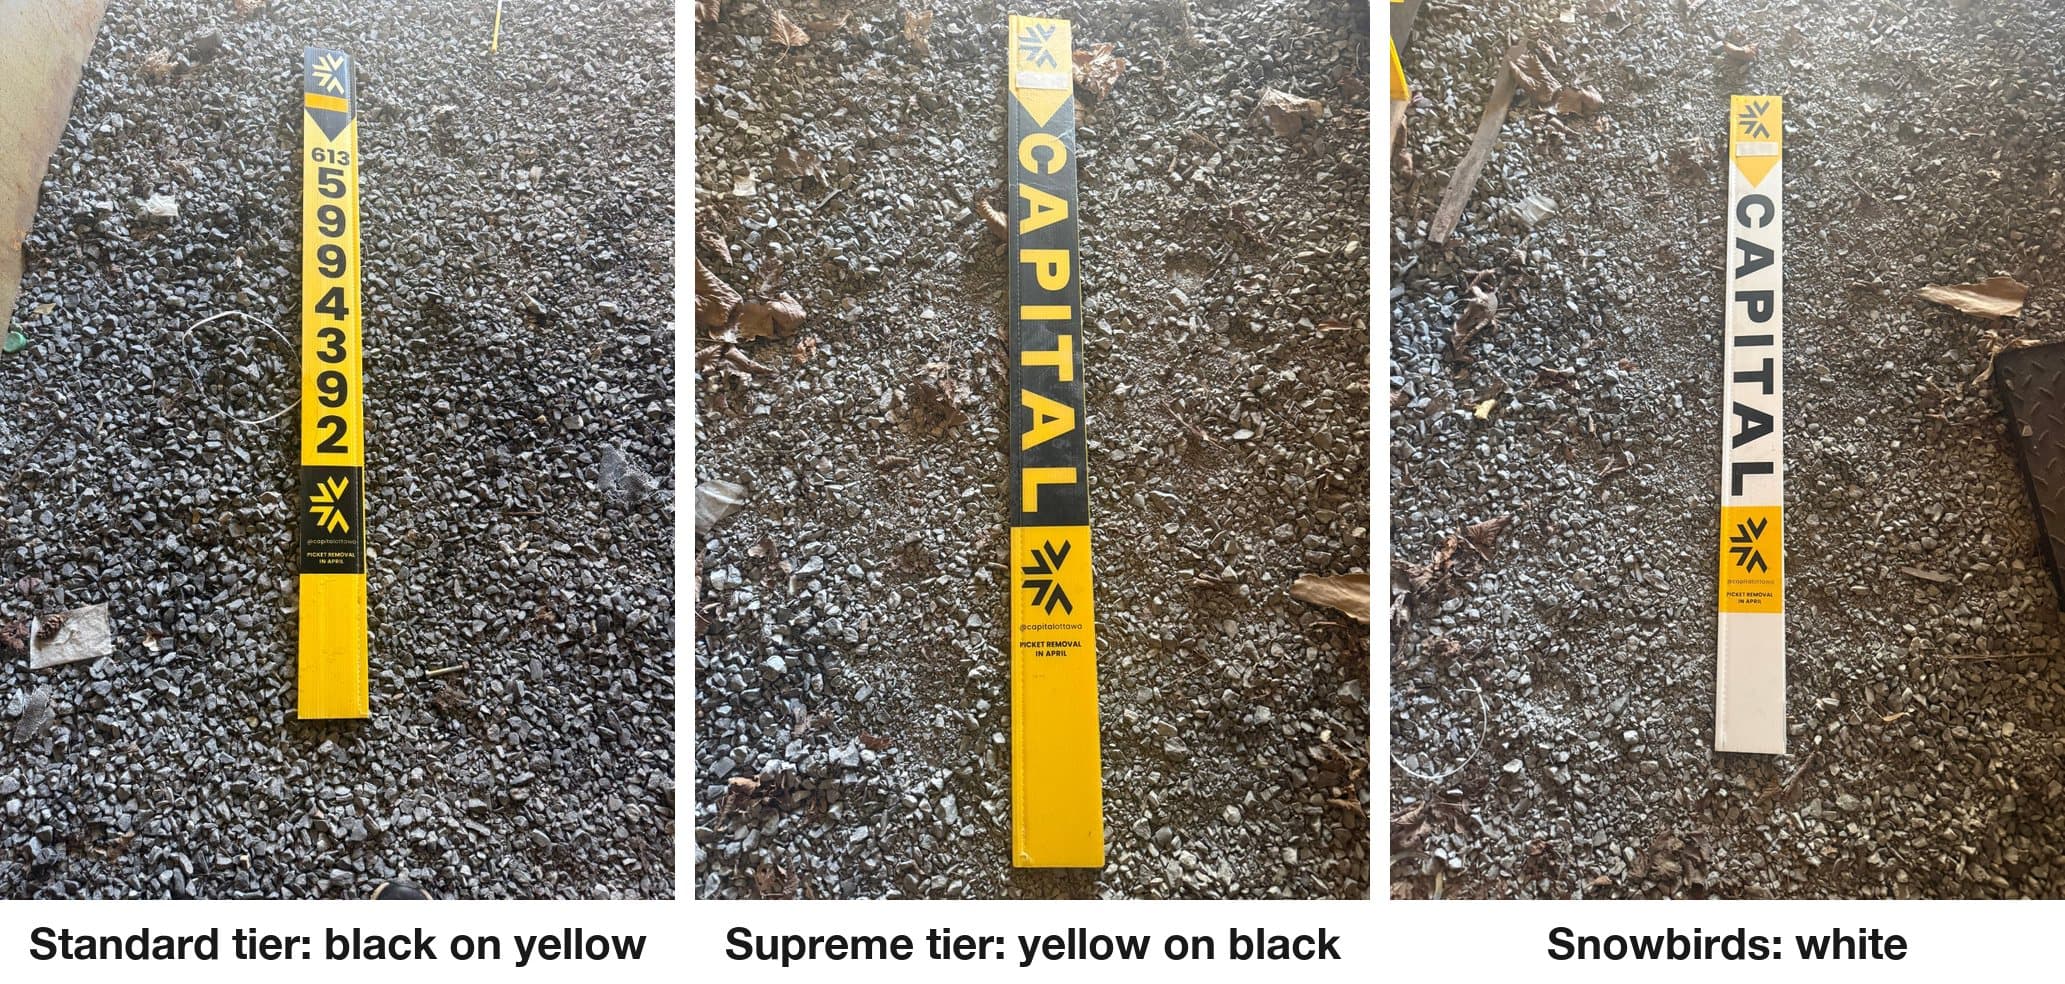
The service tier is marked in Aurora, and the look of the picket matches it: black on yellow for Standard, yellow on black for Supreme, white for Snowbirds.
How many pickets per property
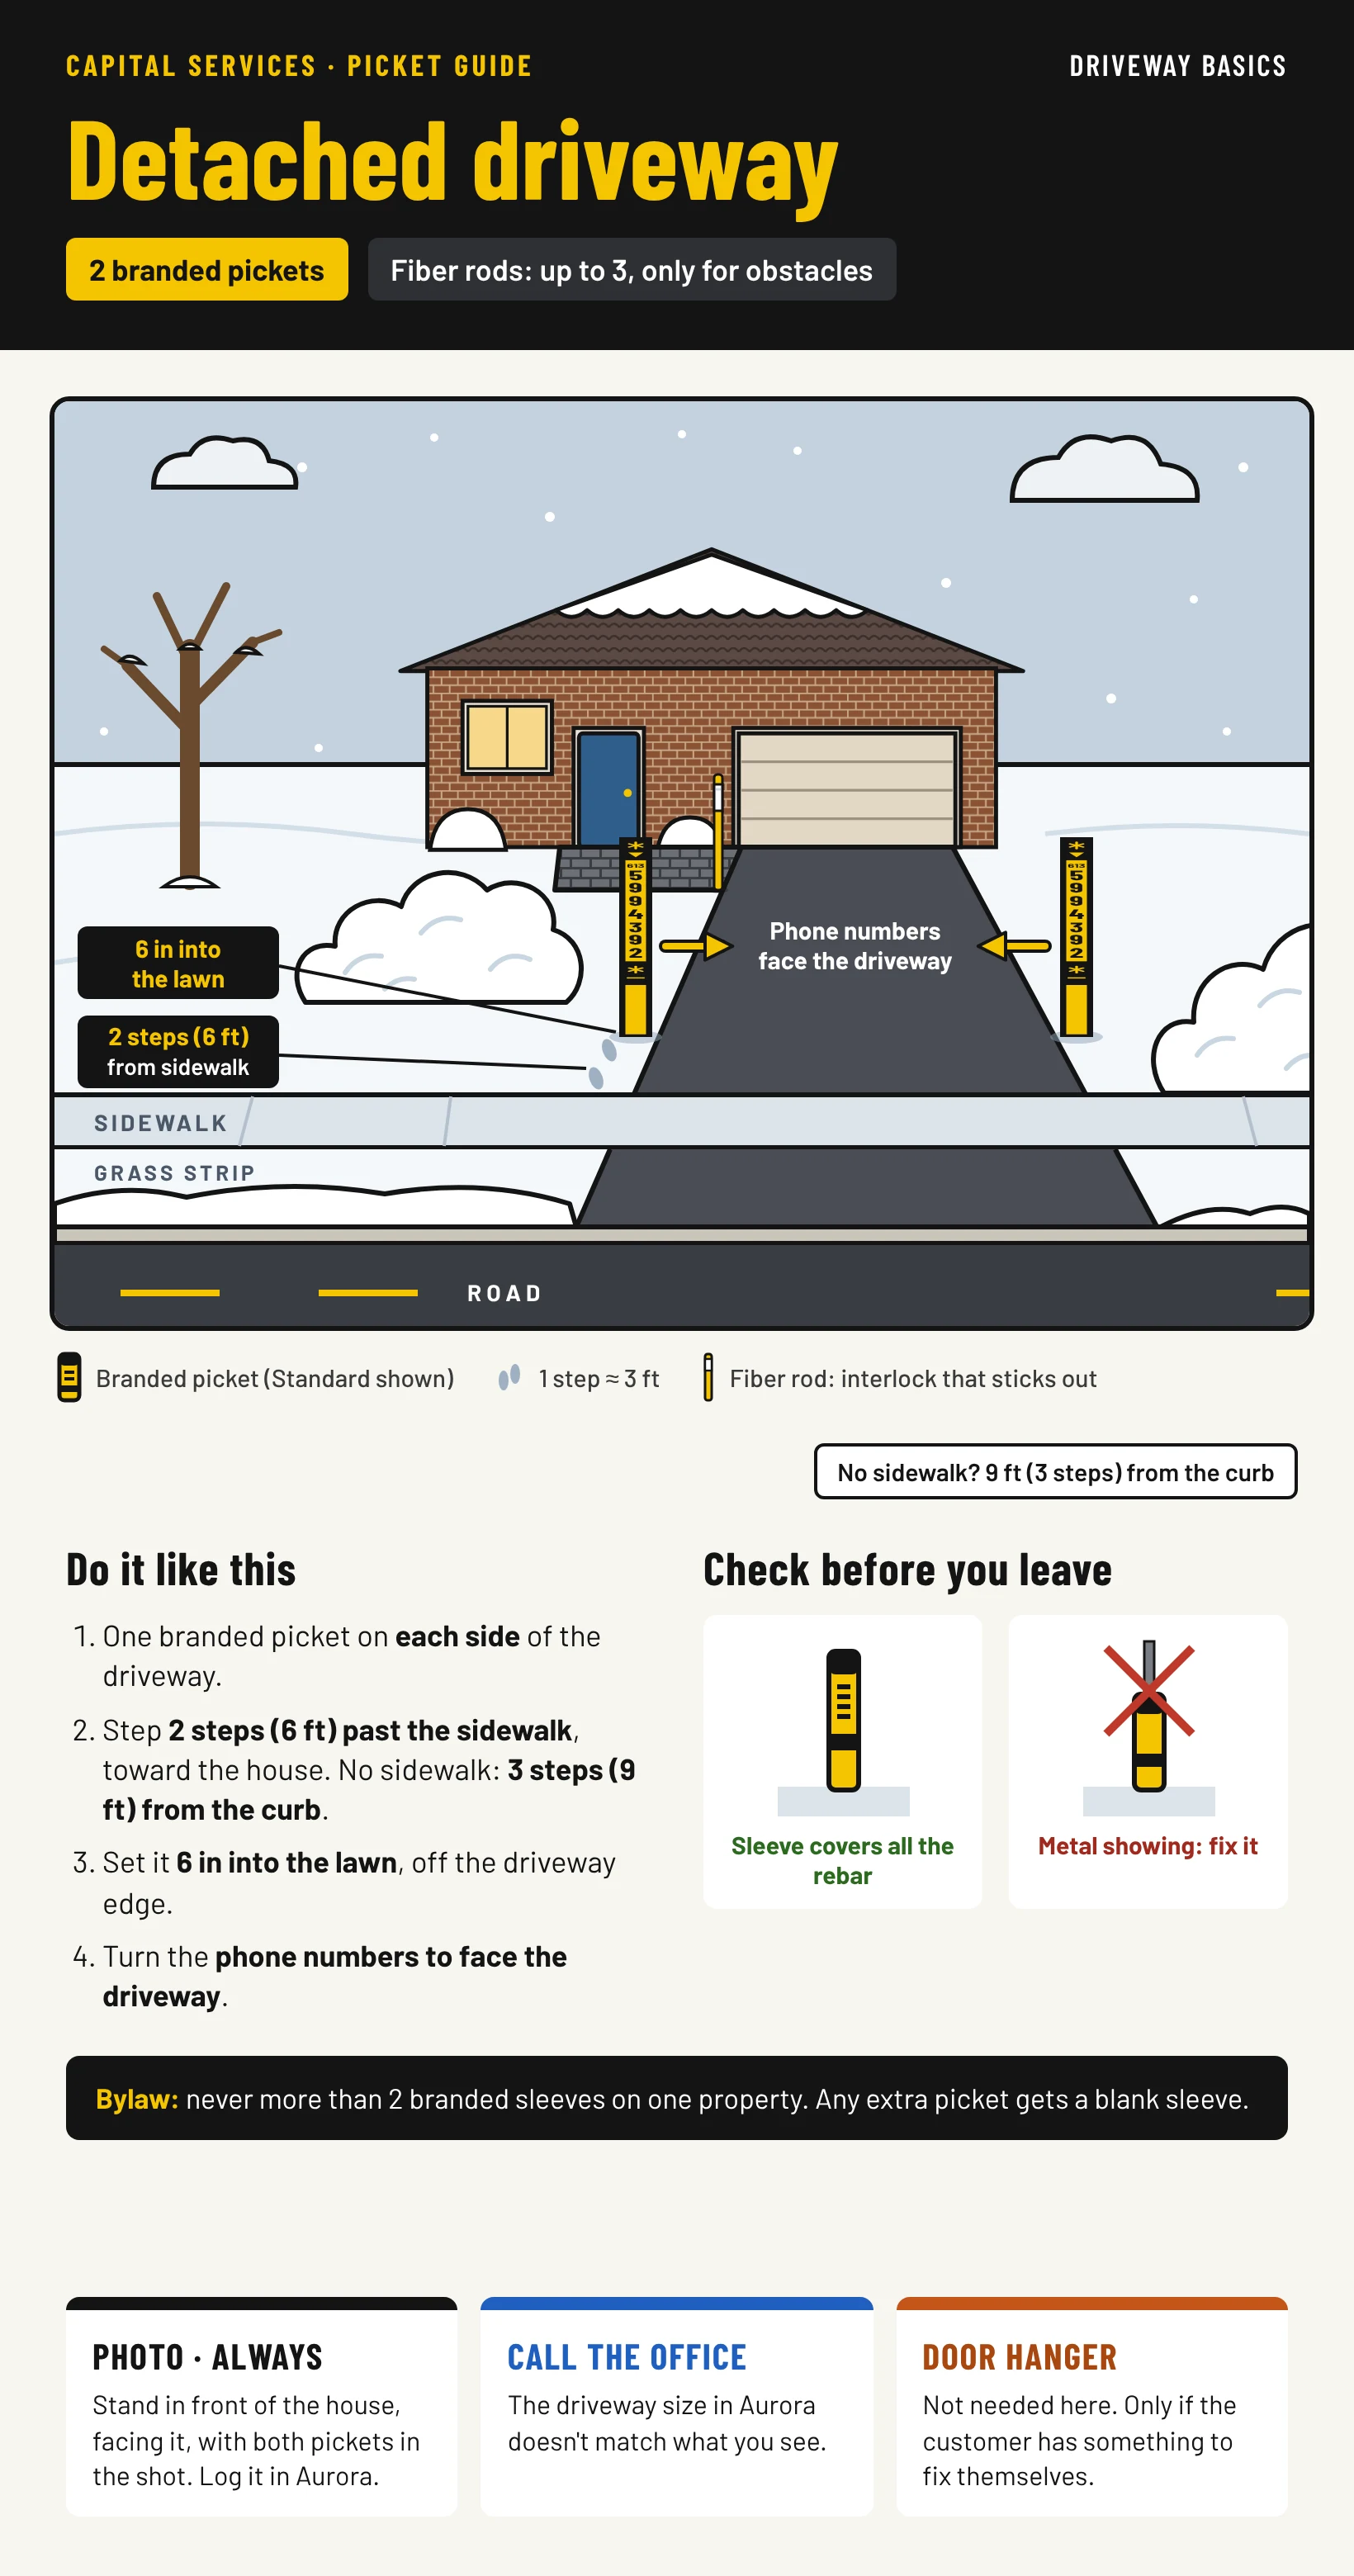
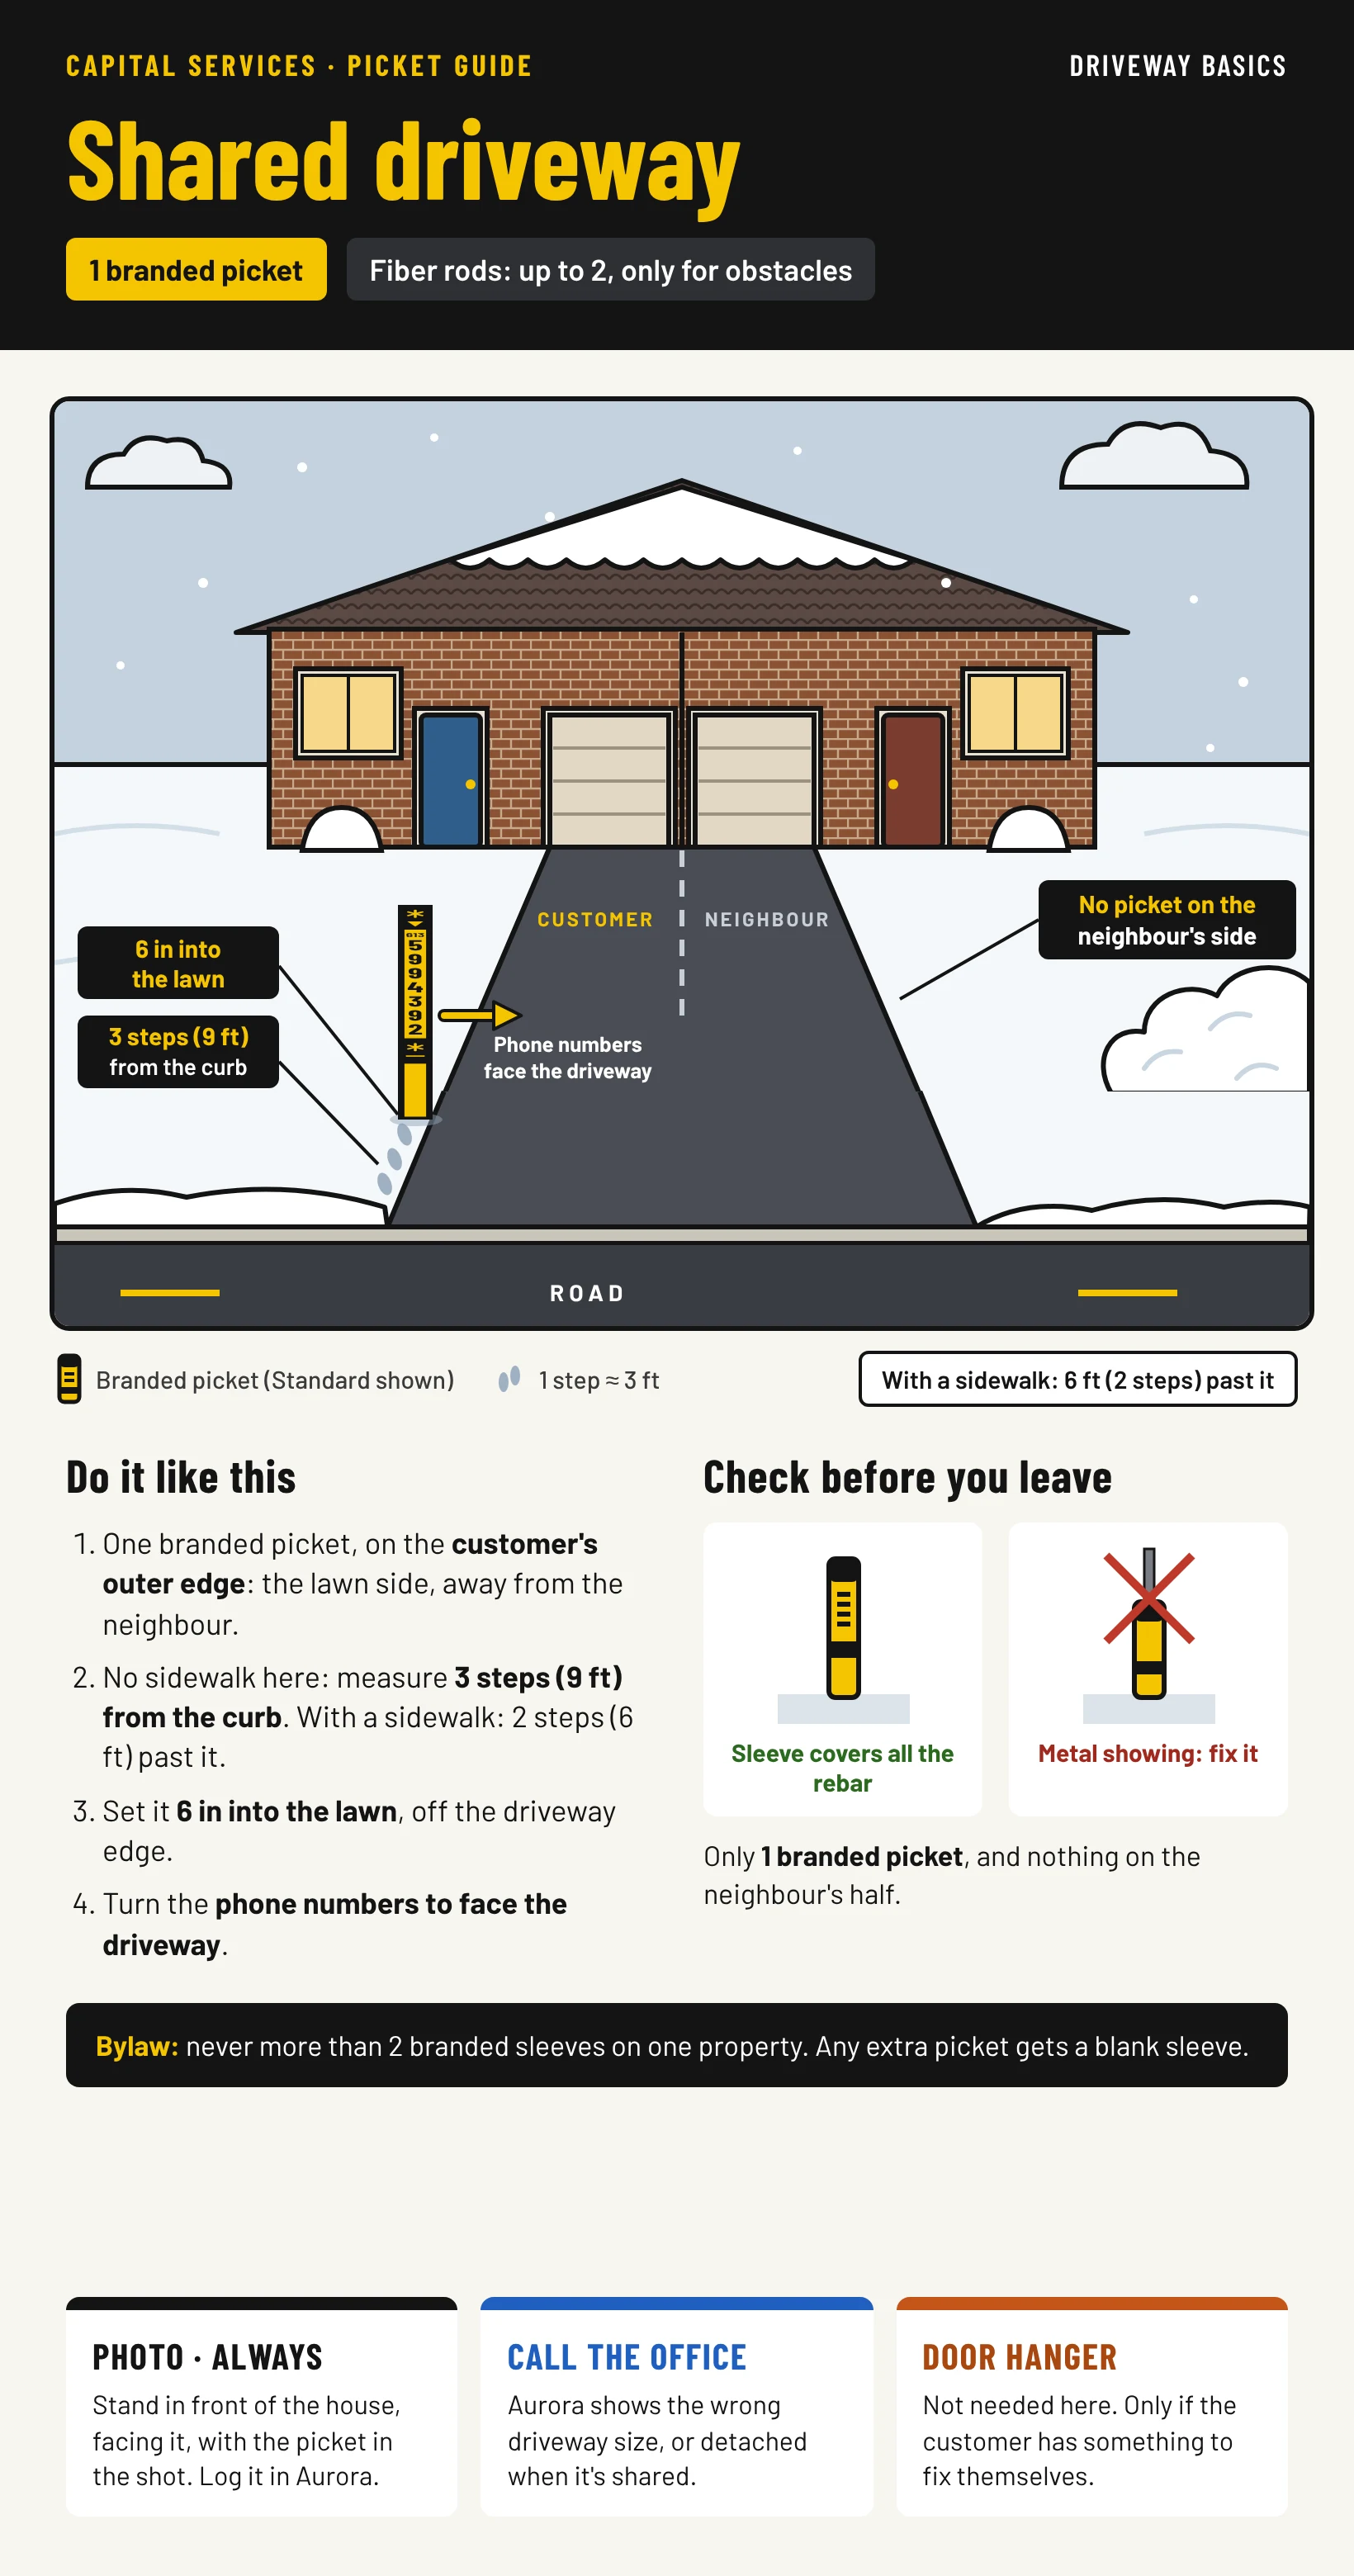
A shared driveway gets one branded picket, a detached driveway gets two.
| Driveway type | Rebar + branded sleeve | Fiber rods |
|---|---|---|
| Shared driveway | 1 | Up to 2 |
| Detached driveway | 2 | Up to 3 |
Bylaw: never more than 2 branded sleeves per property. Use blank (non-branded) sleeves for any picket beyond that.
Where to place them
Install each picket 9 ft (3 steps) from the curb and 6 ft (2 steps) from the sidewalk.
- Phone numbers on the sleeve face inwards.
- The rebar is completely covered by the sleeve. No metal sticks out.
What to picket
Branded pickets mark the driveway; everything else gets a fiber rod, a non-branded picket or a stone block.
| Situation | Use |
|---|---|
| The driveway itself | Branded picket (rebar + sleeve): 1 for shared, 2 for detached |
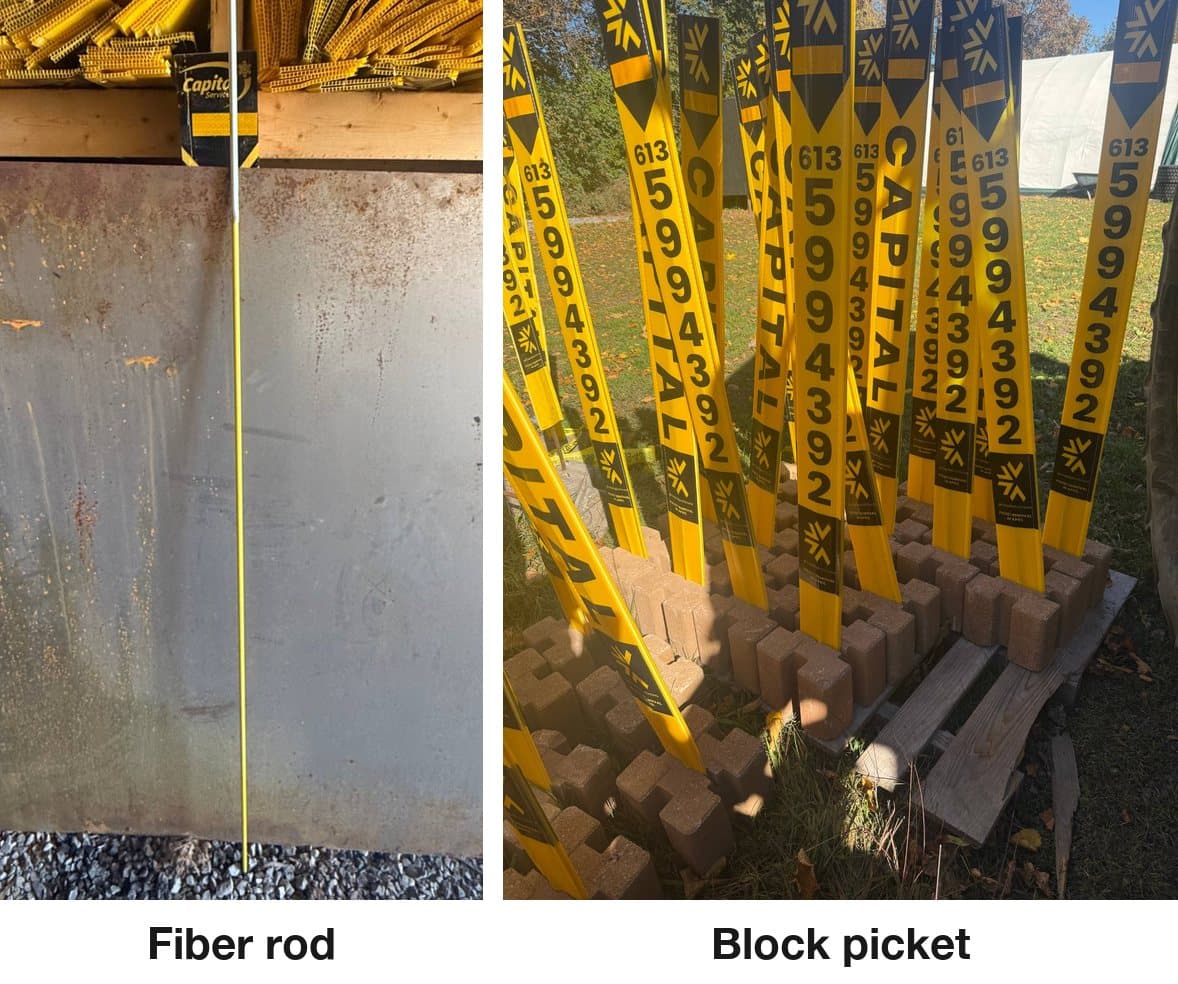
| Interlock sticking out into the driveway, or any obstacle that can be damaged or can damage property or blowers | Fiber rod. Fiber rods are used only for these |
| River rock border | Non-branded picket, as a second picket closer to the garage door |
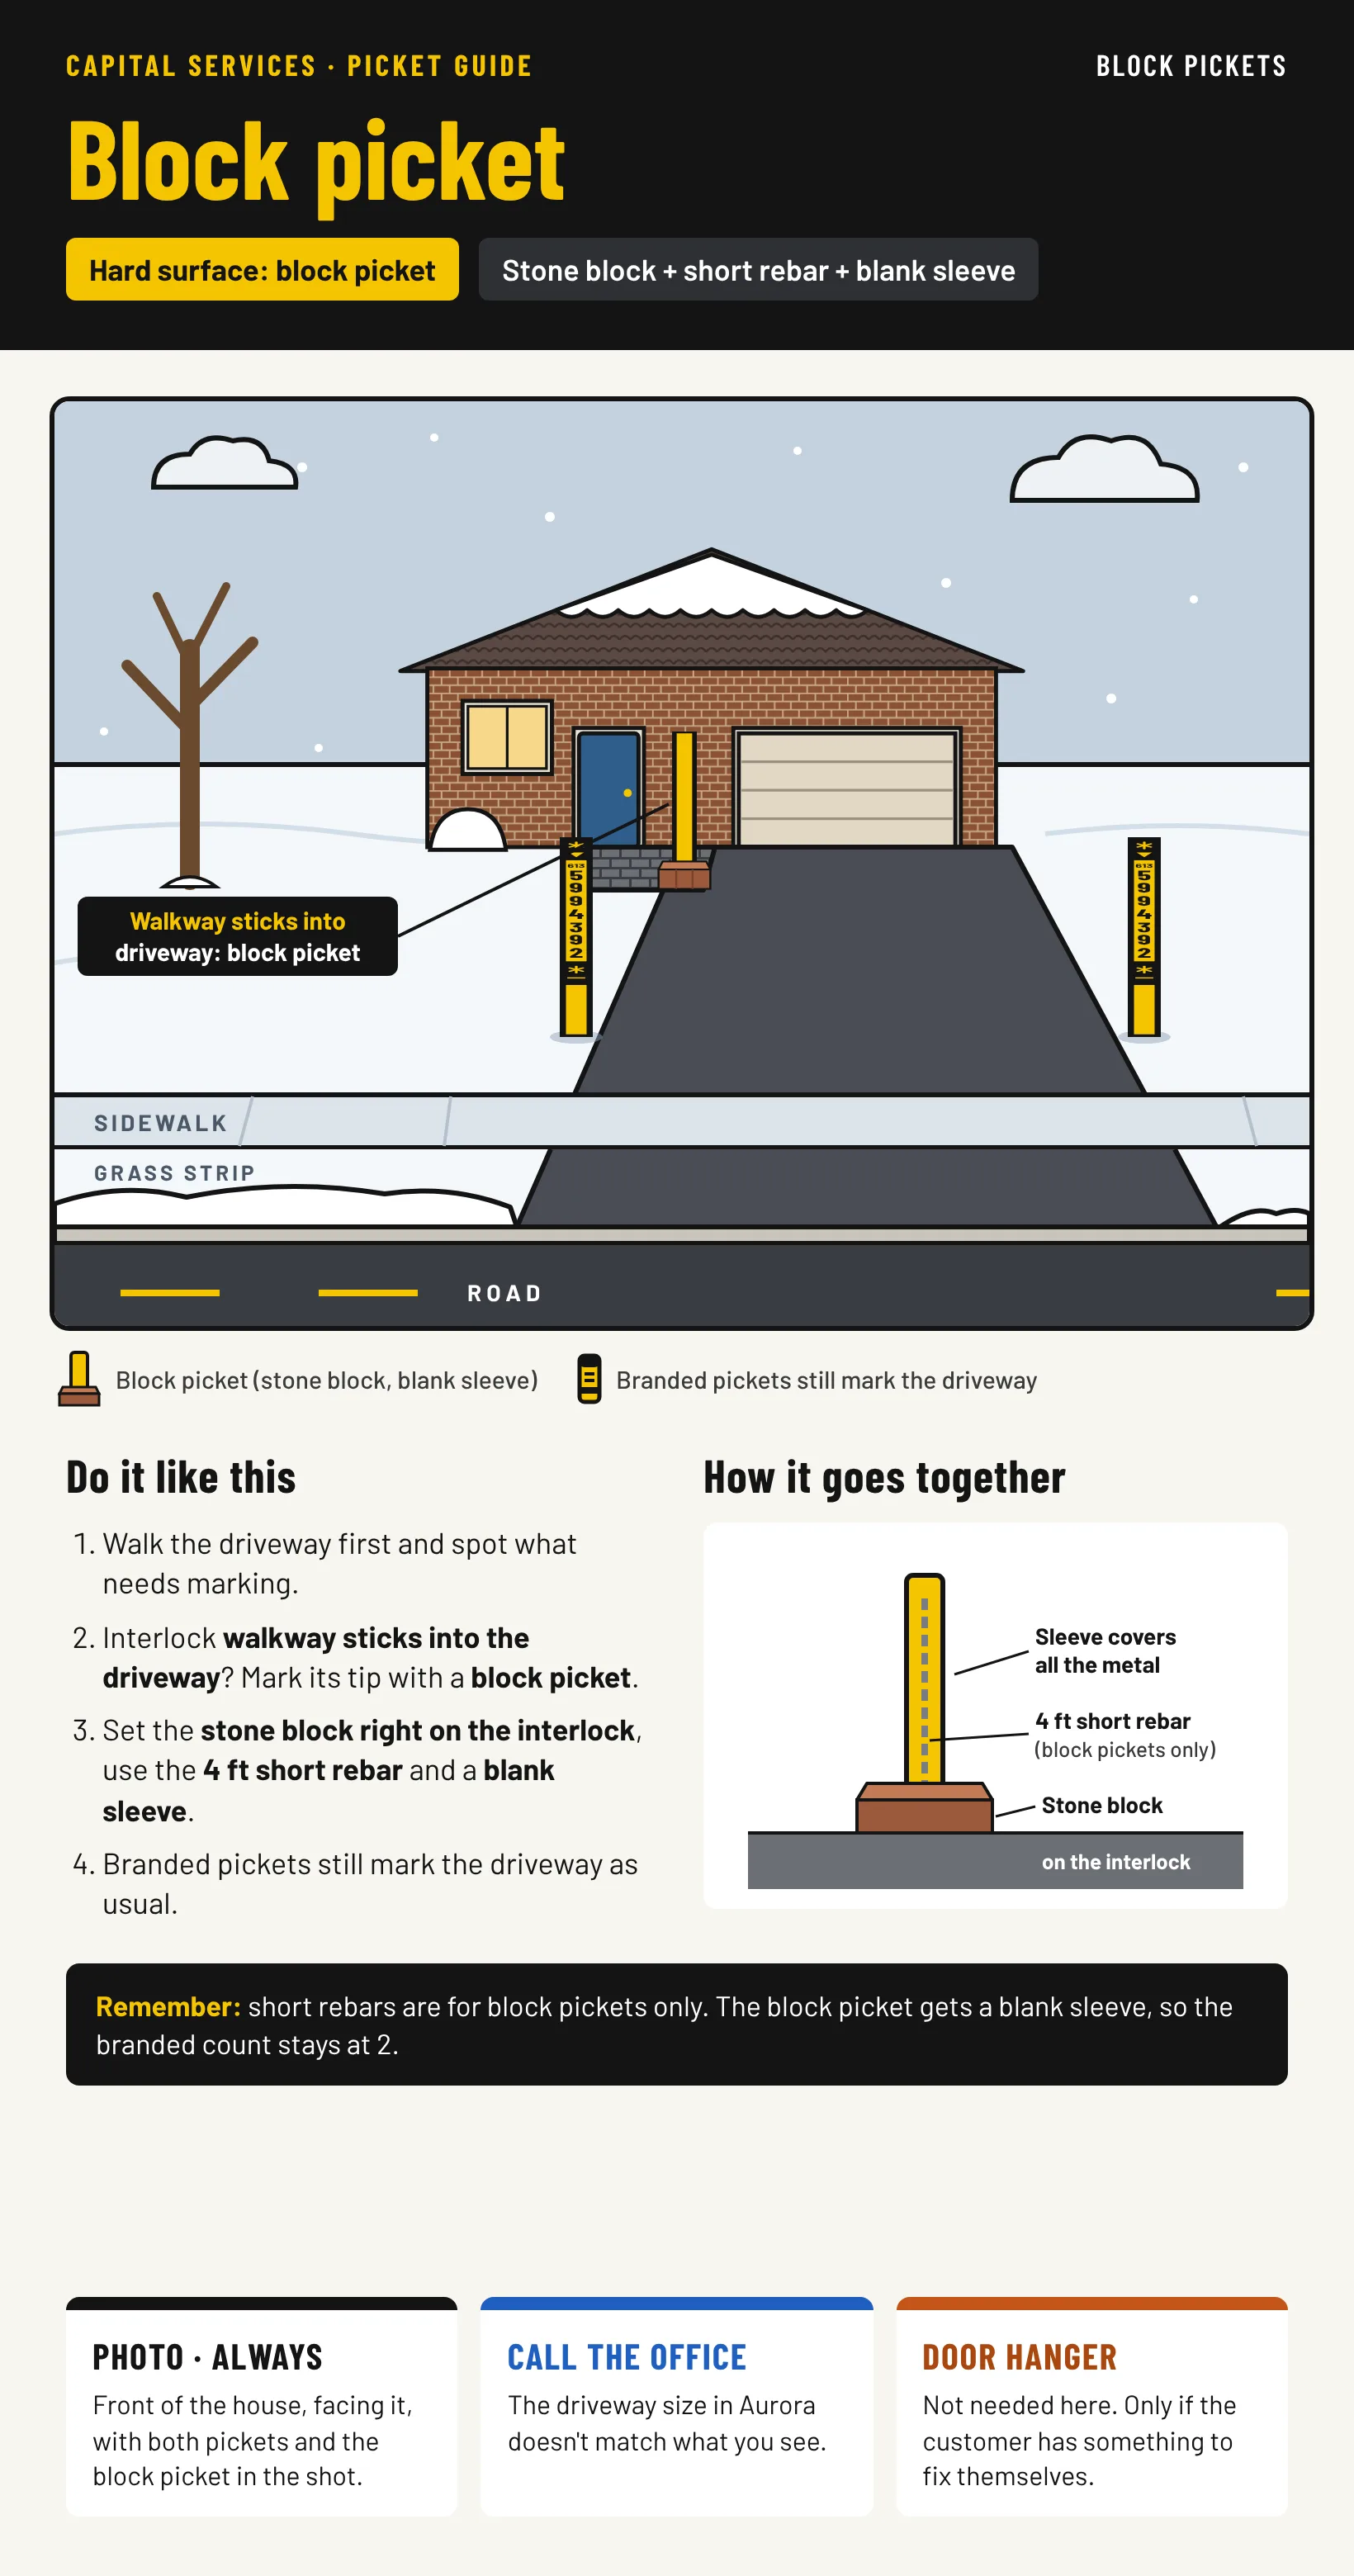
| Surface the rebar can't be pushed through (typically new or fancy interlock) | Stone block, with the branded sleeve facing the road. Block pickets use the 4 ft short rebars, and the short rebars are for block pickets only |
| Between interlock and asphalt | Block picket. Always use a block picket here |
Driveway modifications
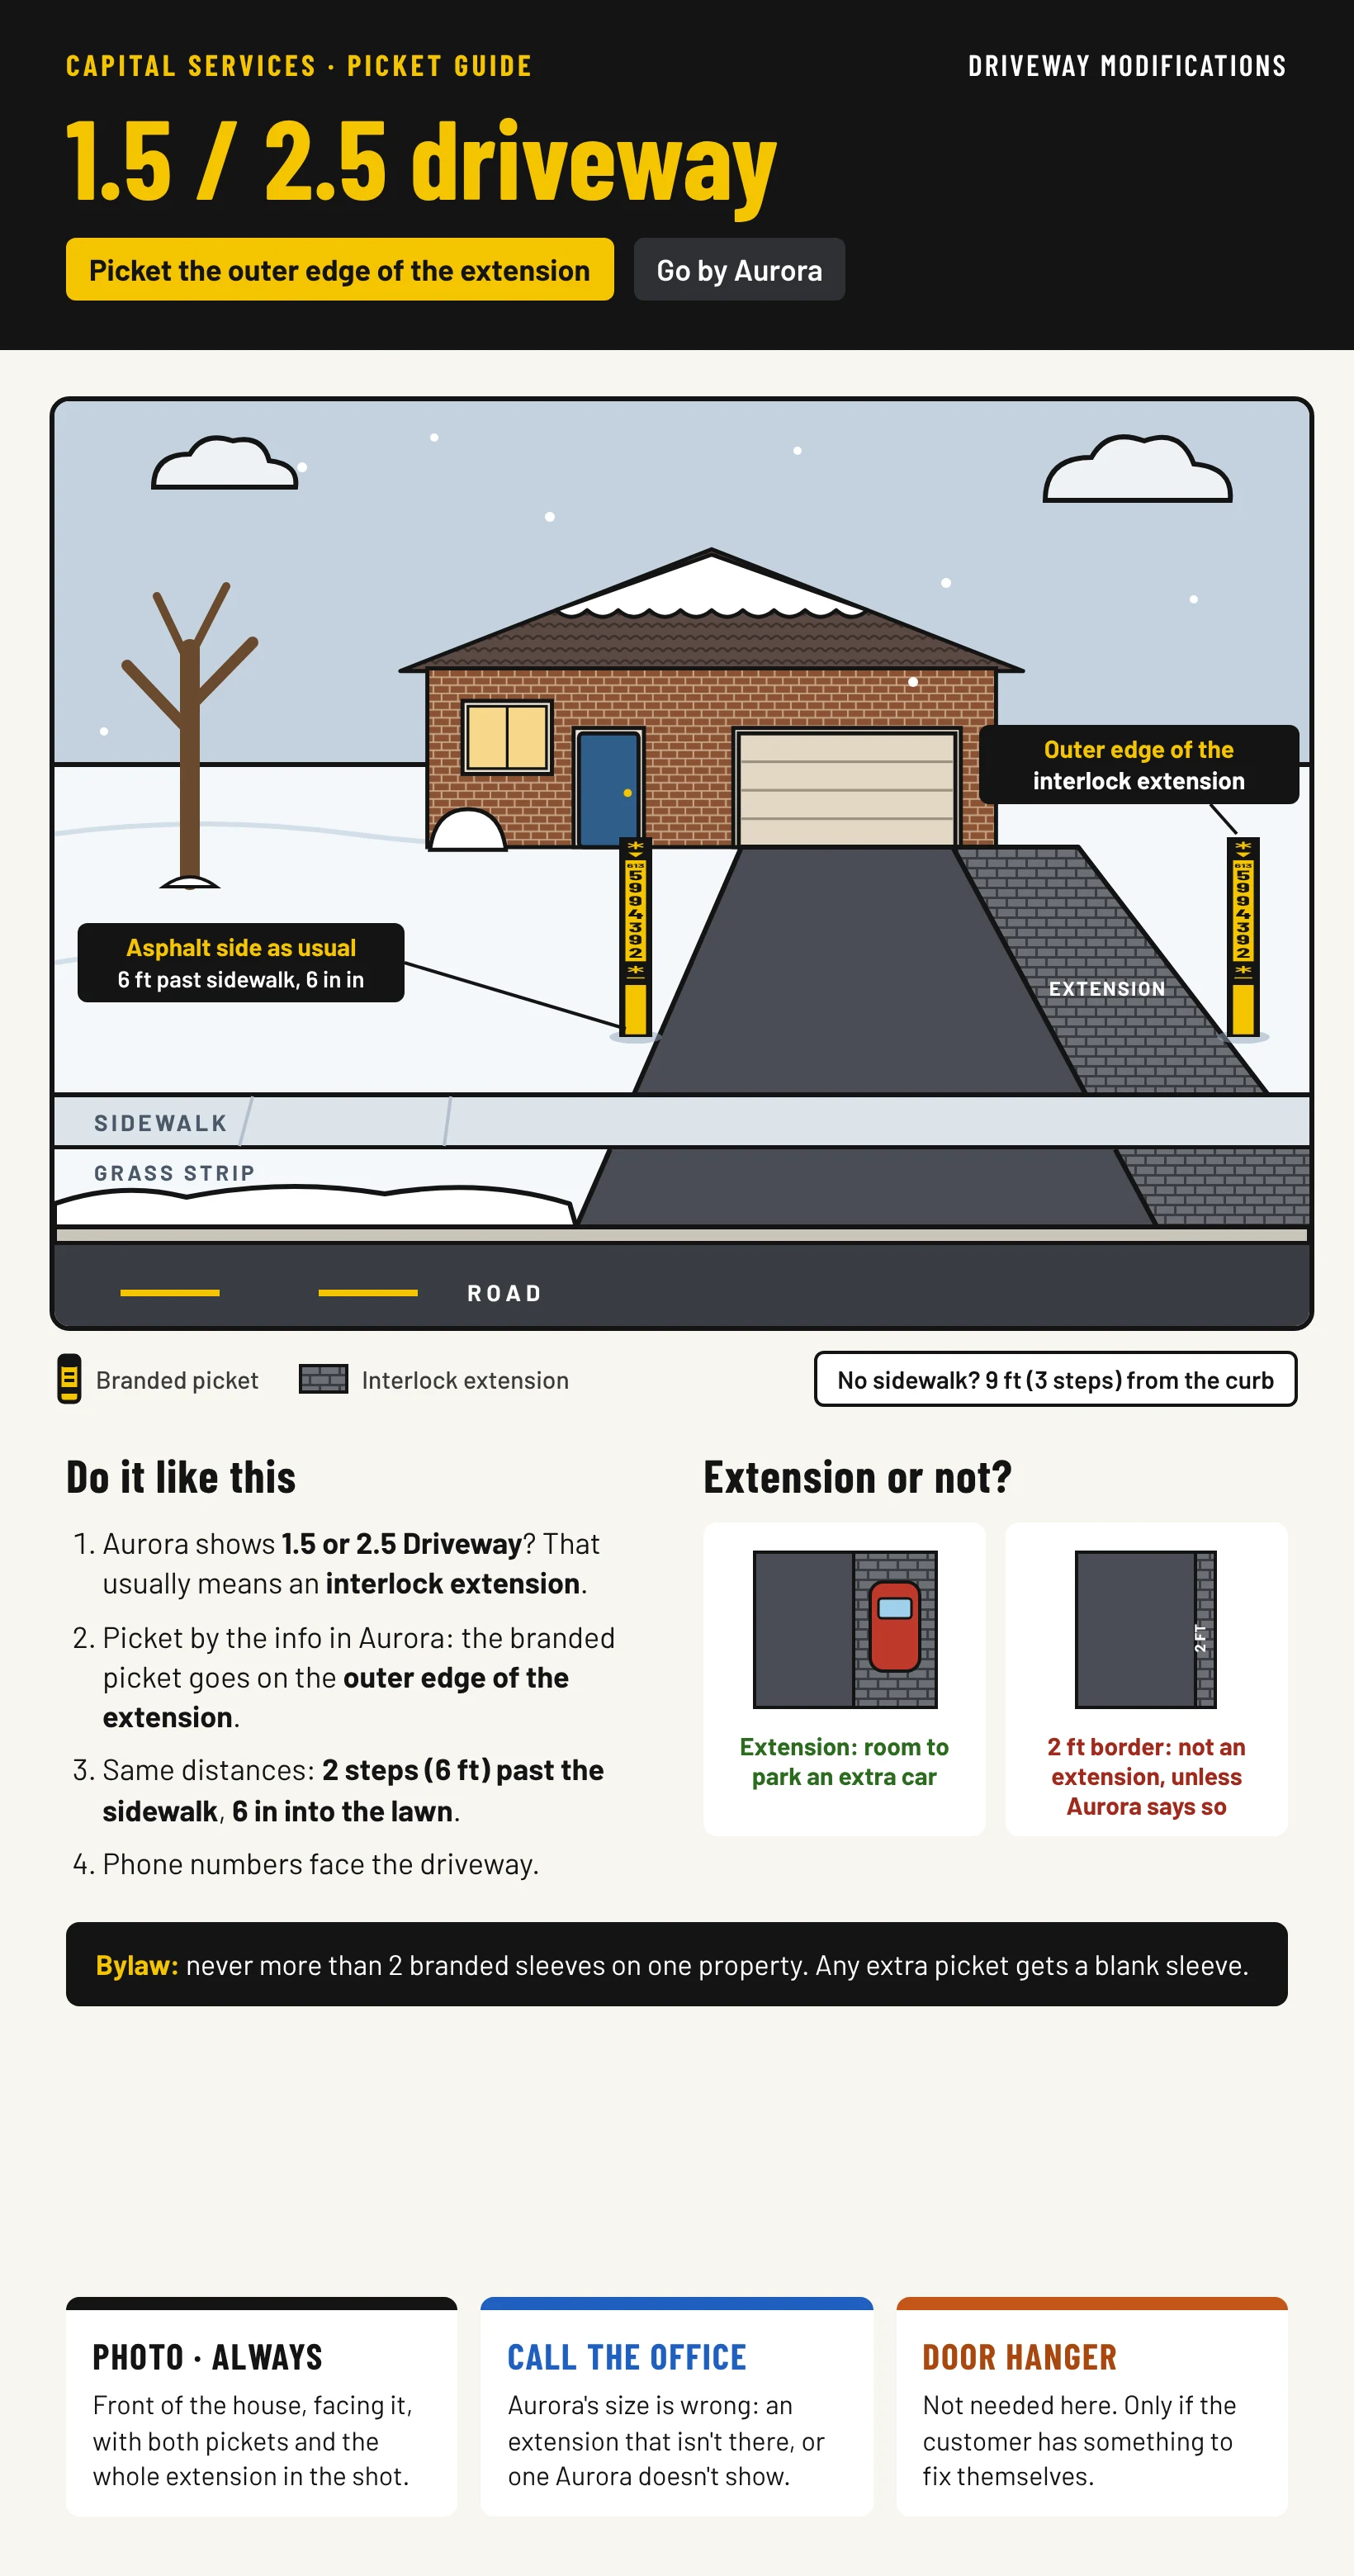
Besides regular single, double, triple and custom driveways, Aurora may show 1.5 or 2.5 Driveway, usually because of an interlock extension. Picket according to the information in Aurora.
An extension is a modification that lets the homeowner park an extra car. A 2 ft border between the asphalt and the lawn is not an extension unless it is marked in the system.
Picket inserts
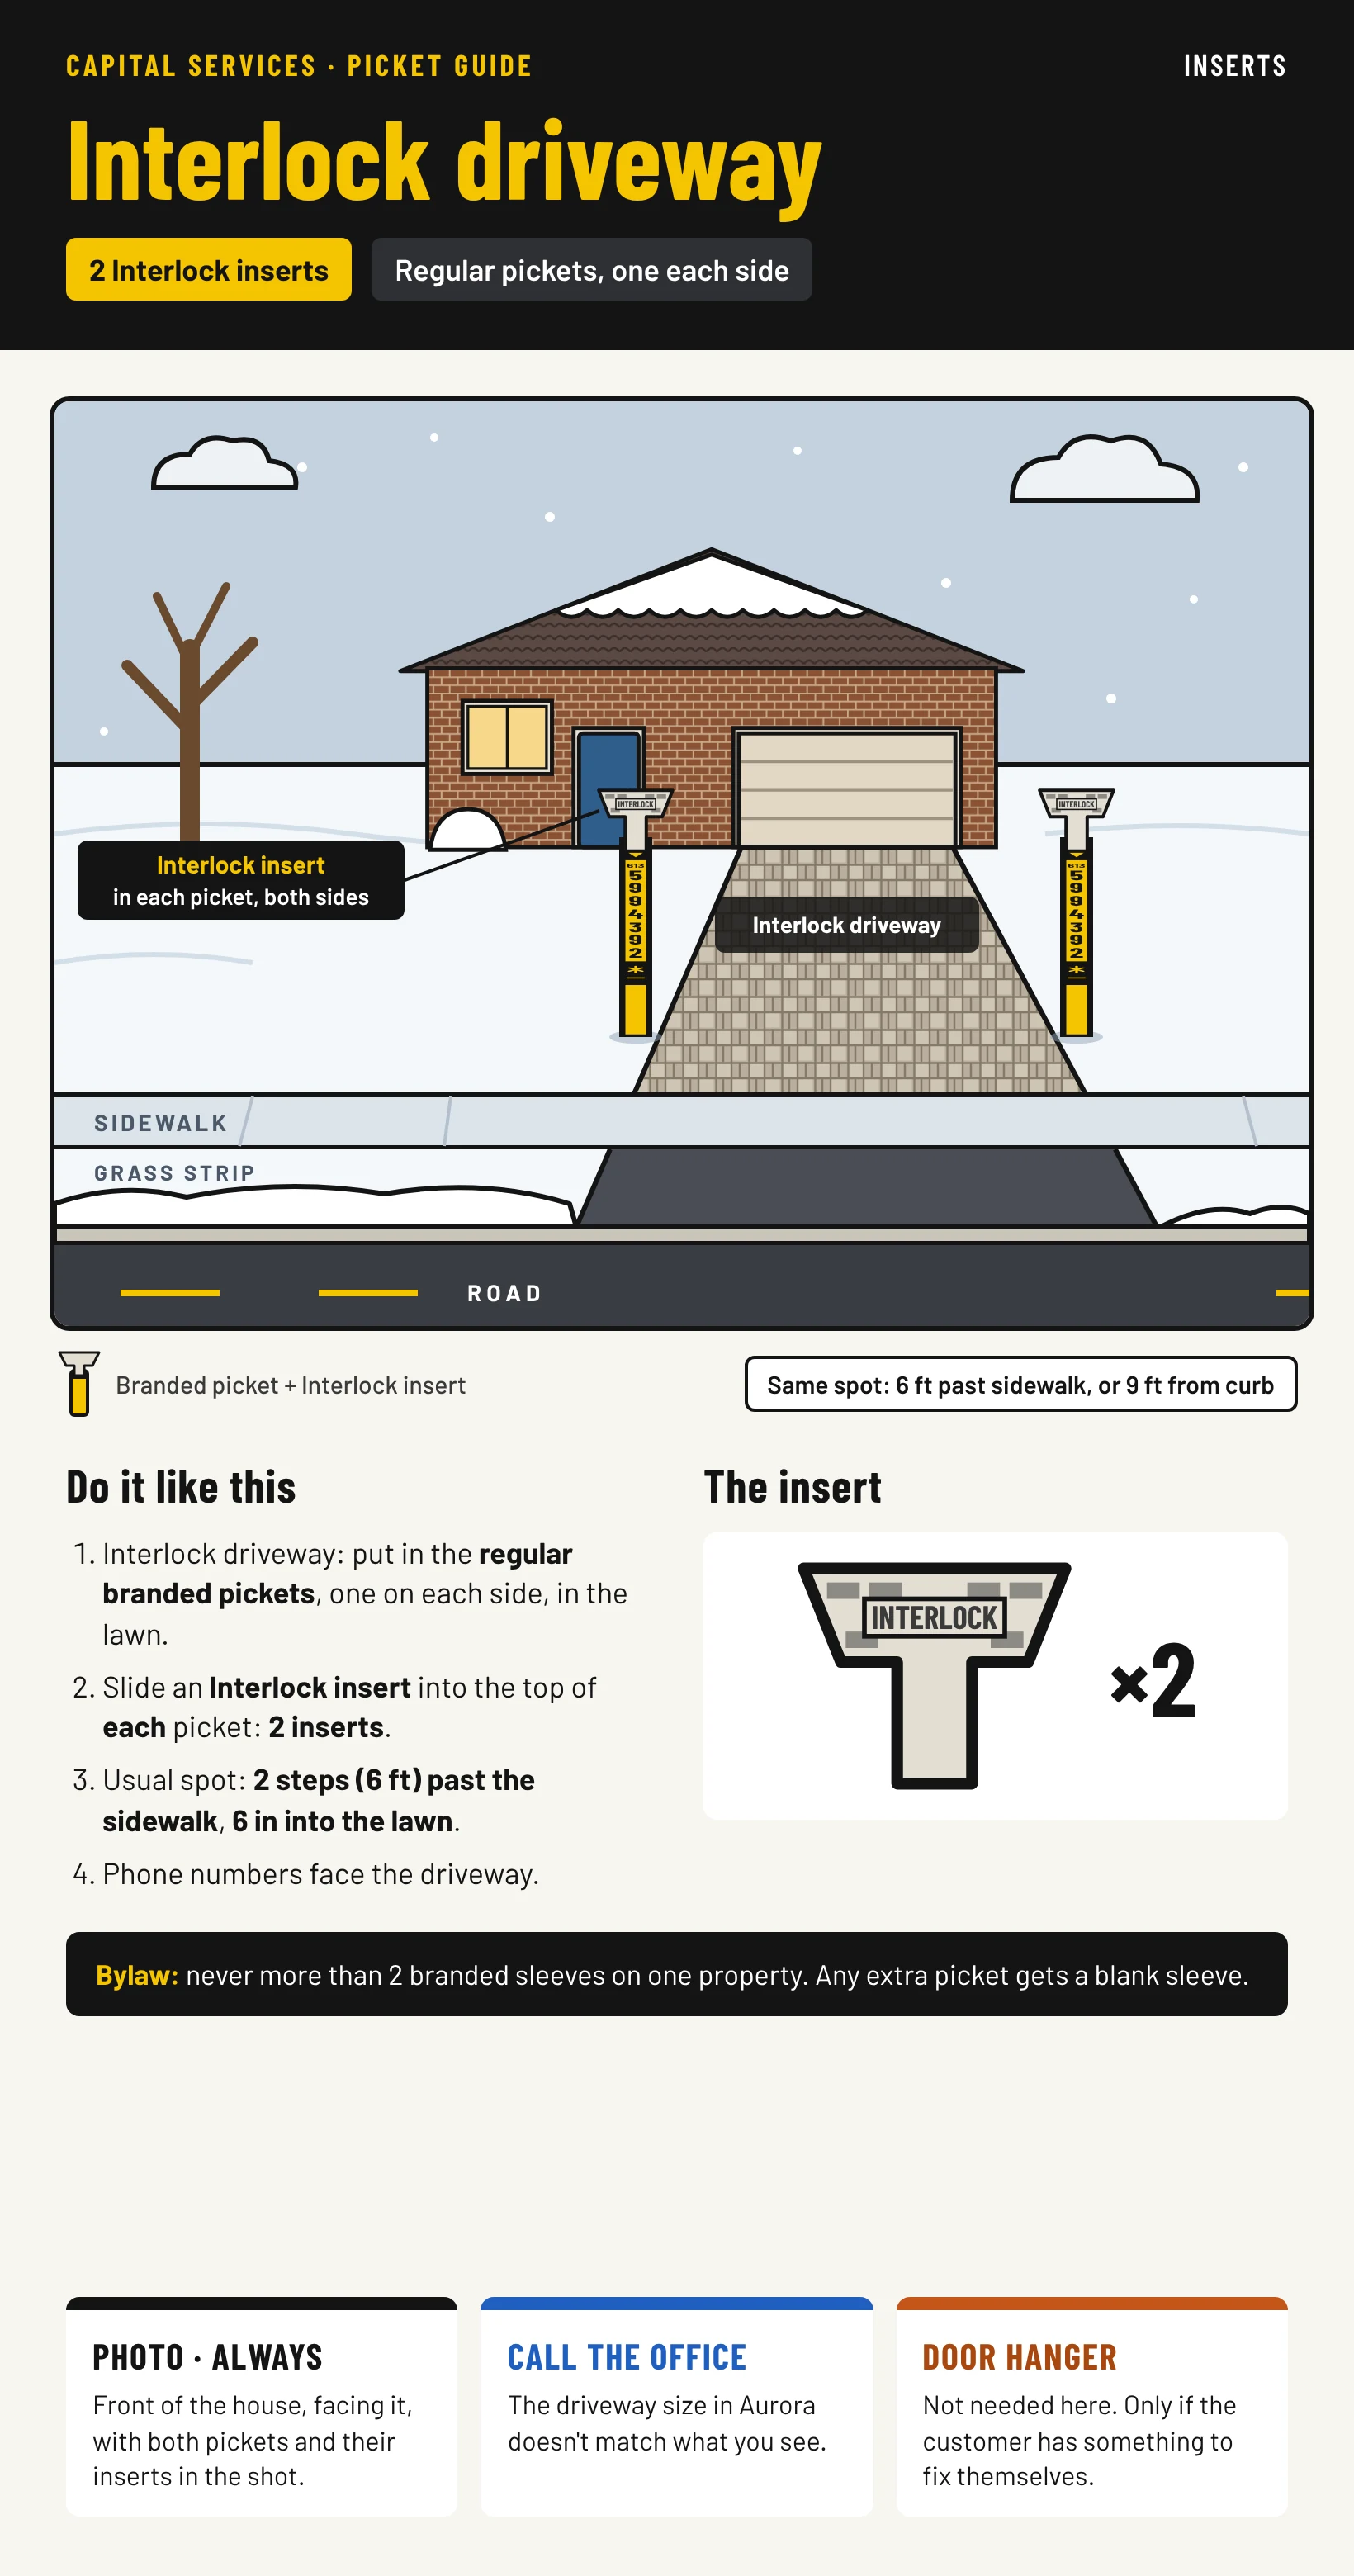
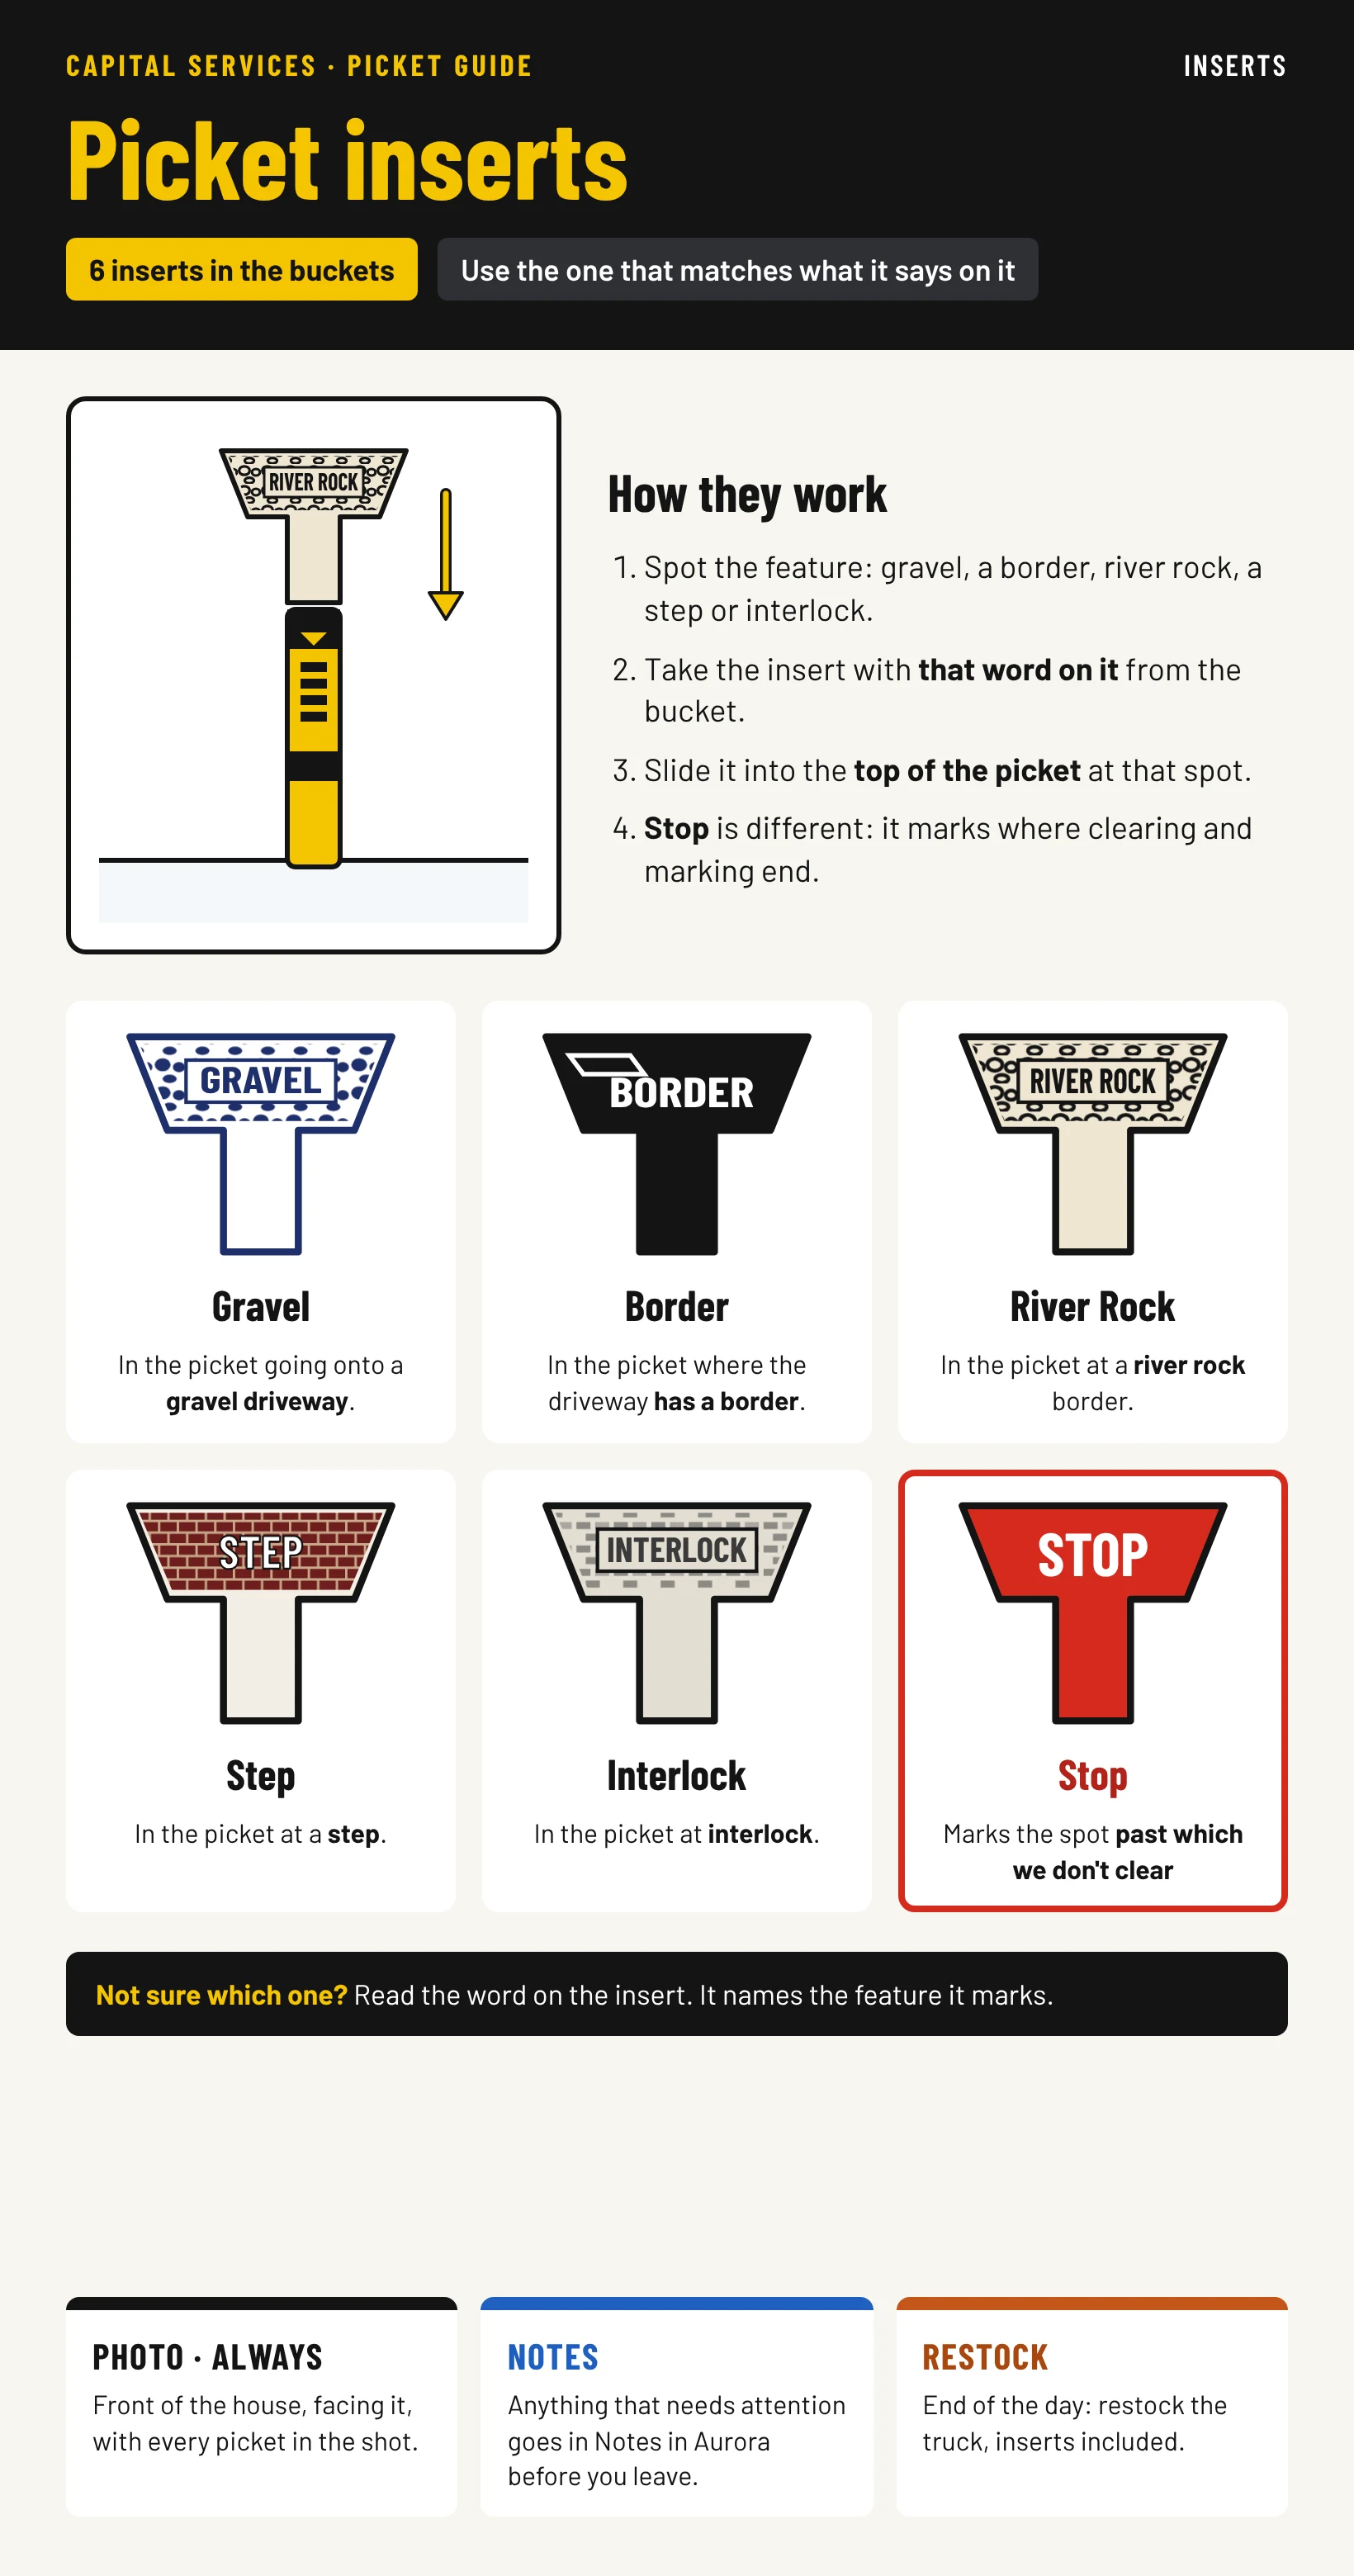
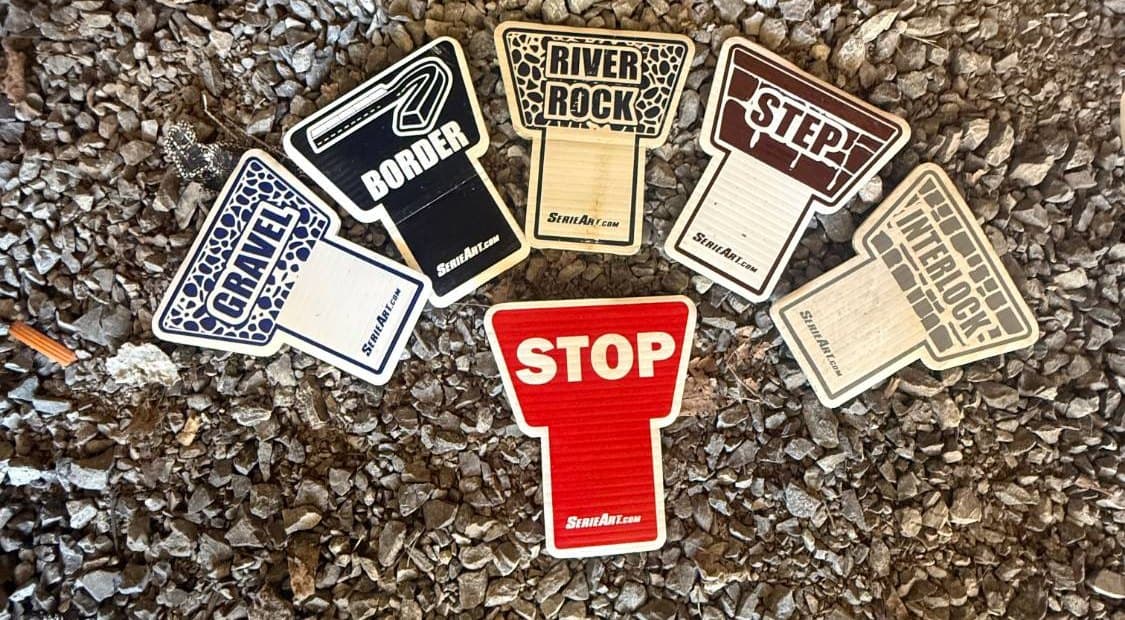
There are six inserts in the buckets: Gravel, Border, River Rock, Step, Interlock and Stop. Use the one that matches what it says on it:
- Gravel: in the picket going onto a gravel driveway.
- Border: in the picket where the driveway has a border.
- River Rock, Step and Interlock: the same way, matching the driveway feature named on the insert.
- Stop: marks the area past which we don't clear or mark any other obstacles.
Install step by step
Work through each property in this order.
- 1
Open the property in Aurora. Note the service tier, the driveway type (shared or detached), any modification such as 1.5 Driveway and any notes.
- 2
Walk the driveway. Spot what needs marking: interlock sticking out, river rock borders, anything that could be damaged or could damage a blower.
- 3
Install the branded picket or pickets. One for shared, two for detached. 9 ft from the curb, 6 ft from the sidewalk, 6 in into the lawn. Cover the rebar completely with the sleeve and turn the phone numbers inwards.
- 4
Use a stone block where rebar won't go in. Branded sleeve facing the road. Use the 4 ft short rebar. Always use a block picket wherever you picket between interlock and asphalt.
- 5
Mark the obstacles. Fiber rods for obstacles and interlock. A non-branded picket for a river rock border, as a second picket closer to the garage door.
- 6
Check your work. Right count for the driveway type, no metal sticking out of a sleeve, distances match the company standard (9 ft from the curb, 6 ft from the sidewalk).
- 7
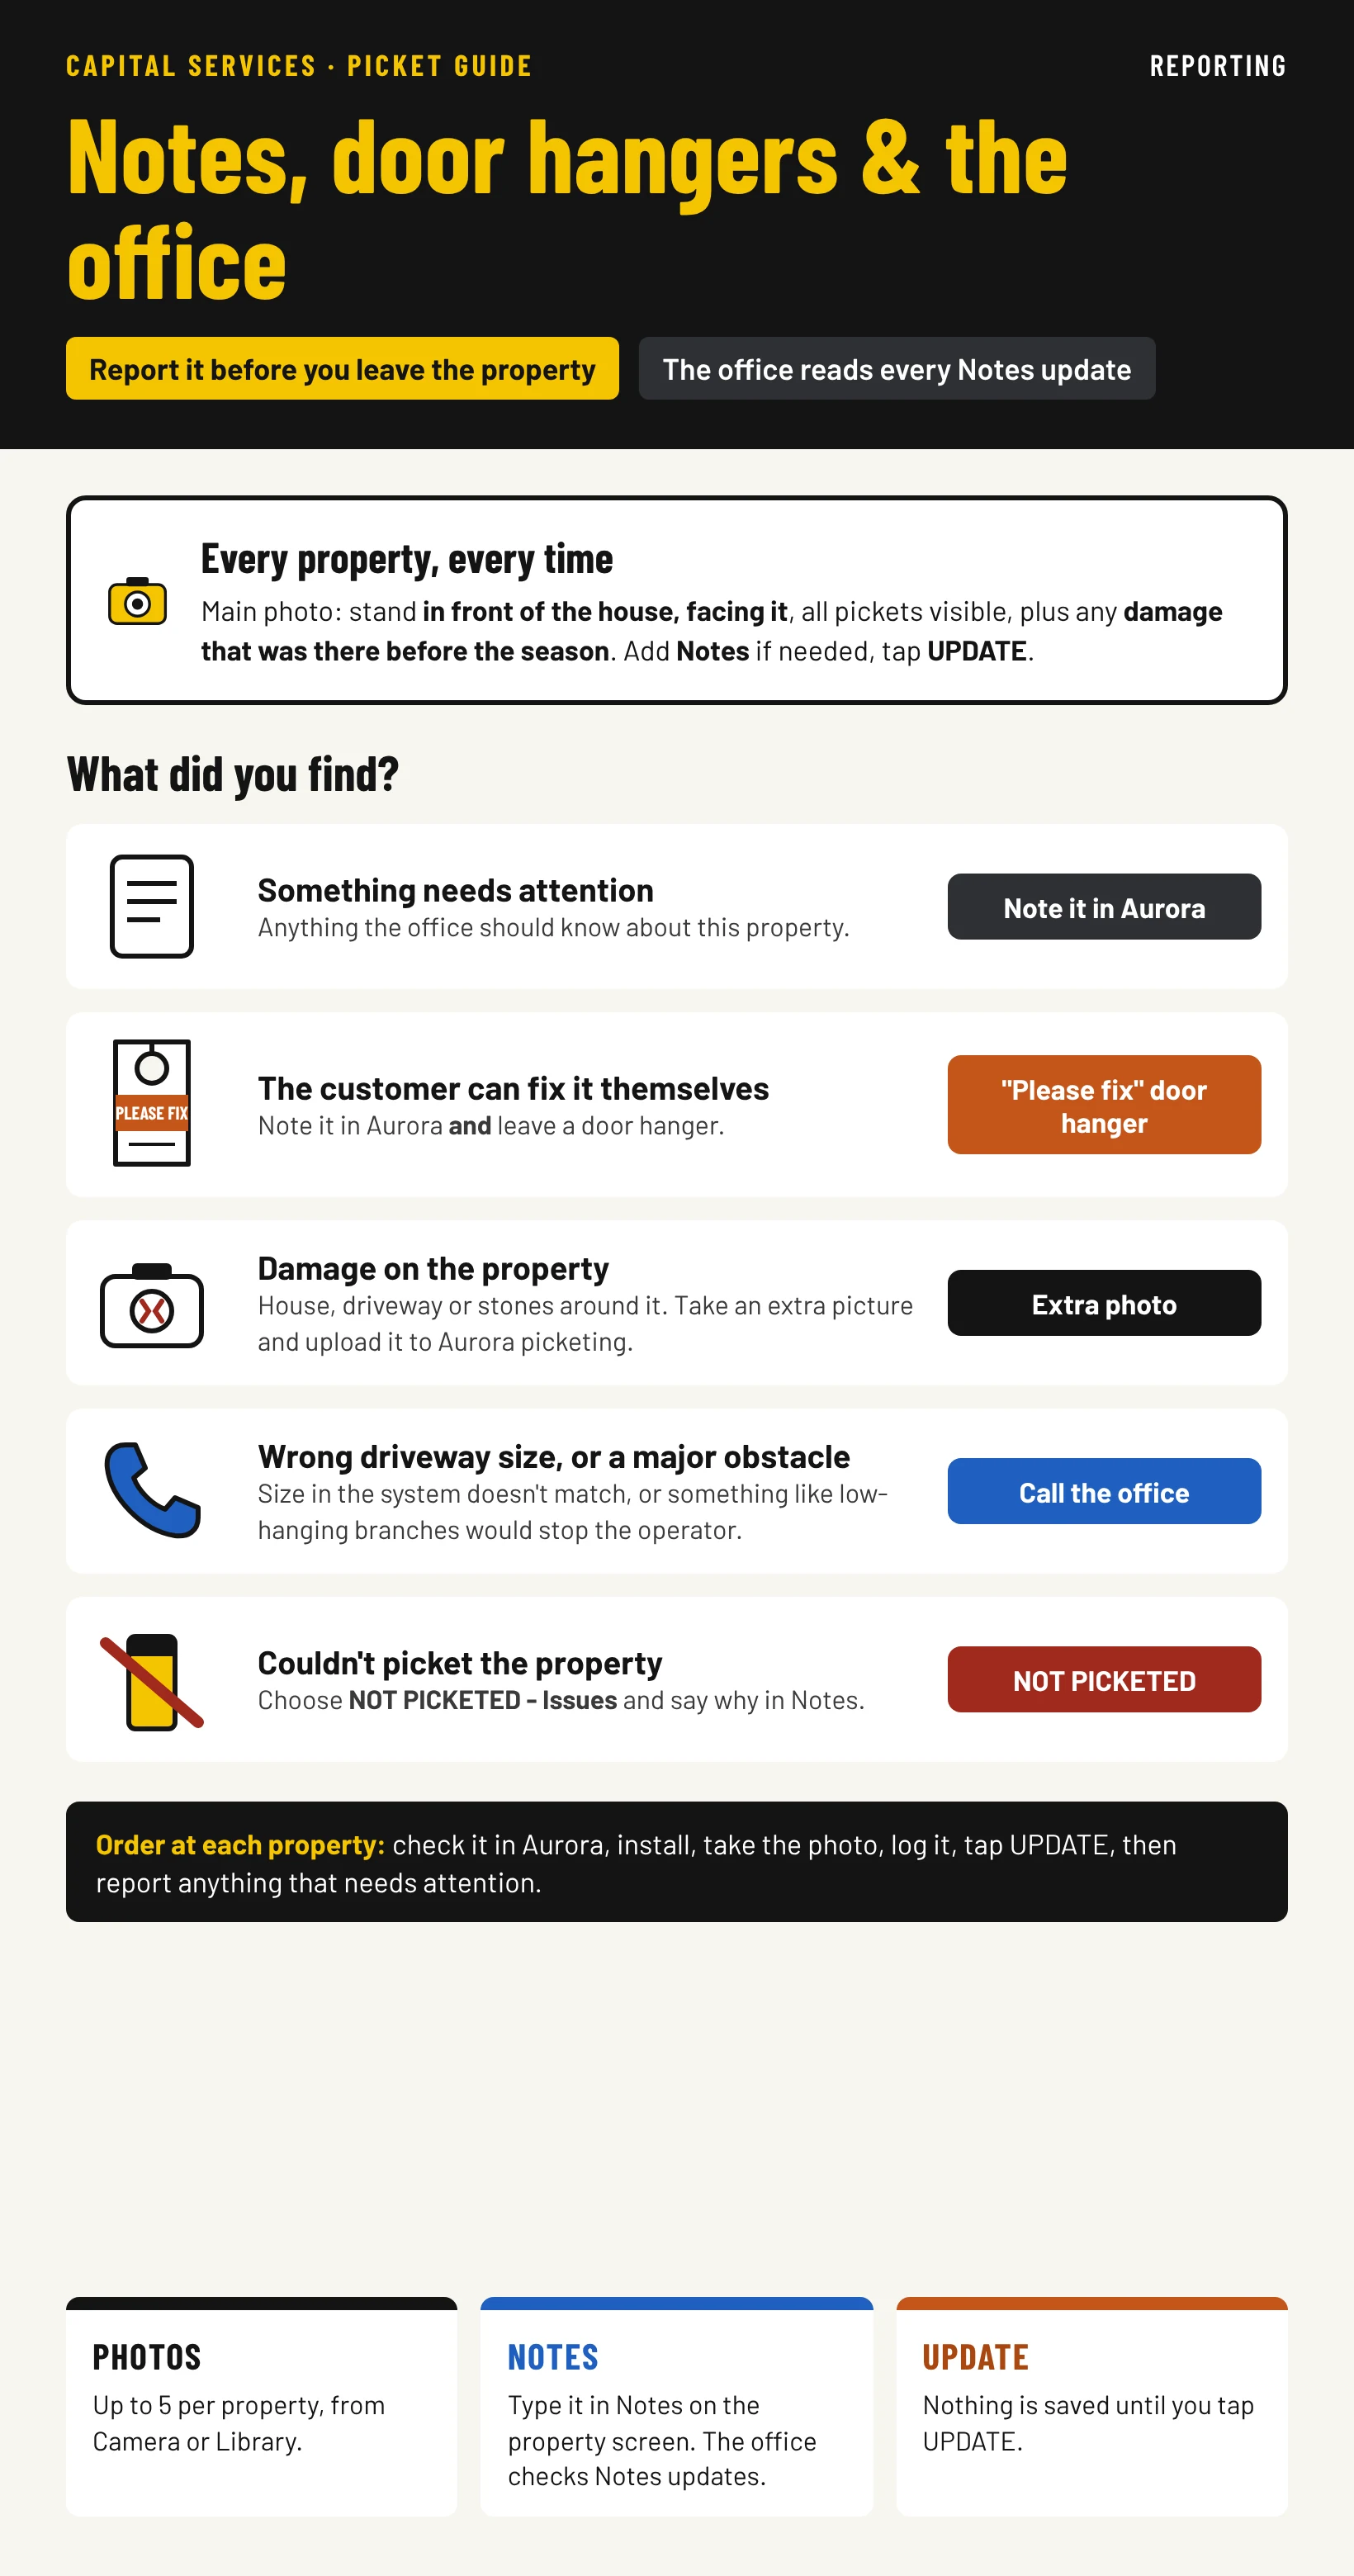
Photo and log. Take the main photo: stand in front of the house, facing the house, with all pickets visible. Then in Aurora set the Piece count, add Notes if needed and tap UPDATE (see the Aurora guide).
- 8
Report problems. Anything that needs attention (see the Aurora guide) before you leave the property.
Visual guide
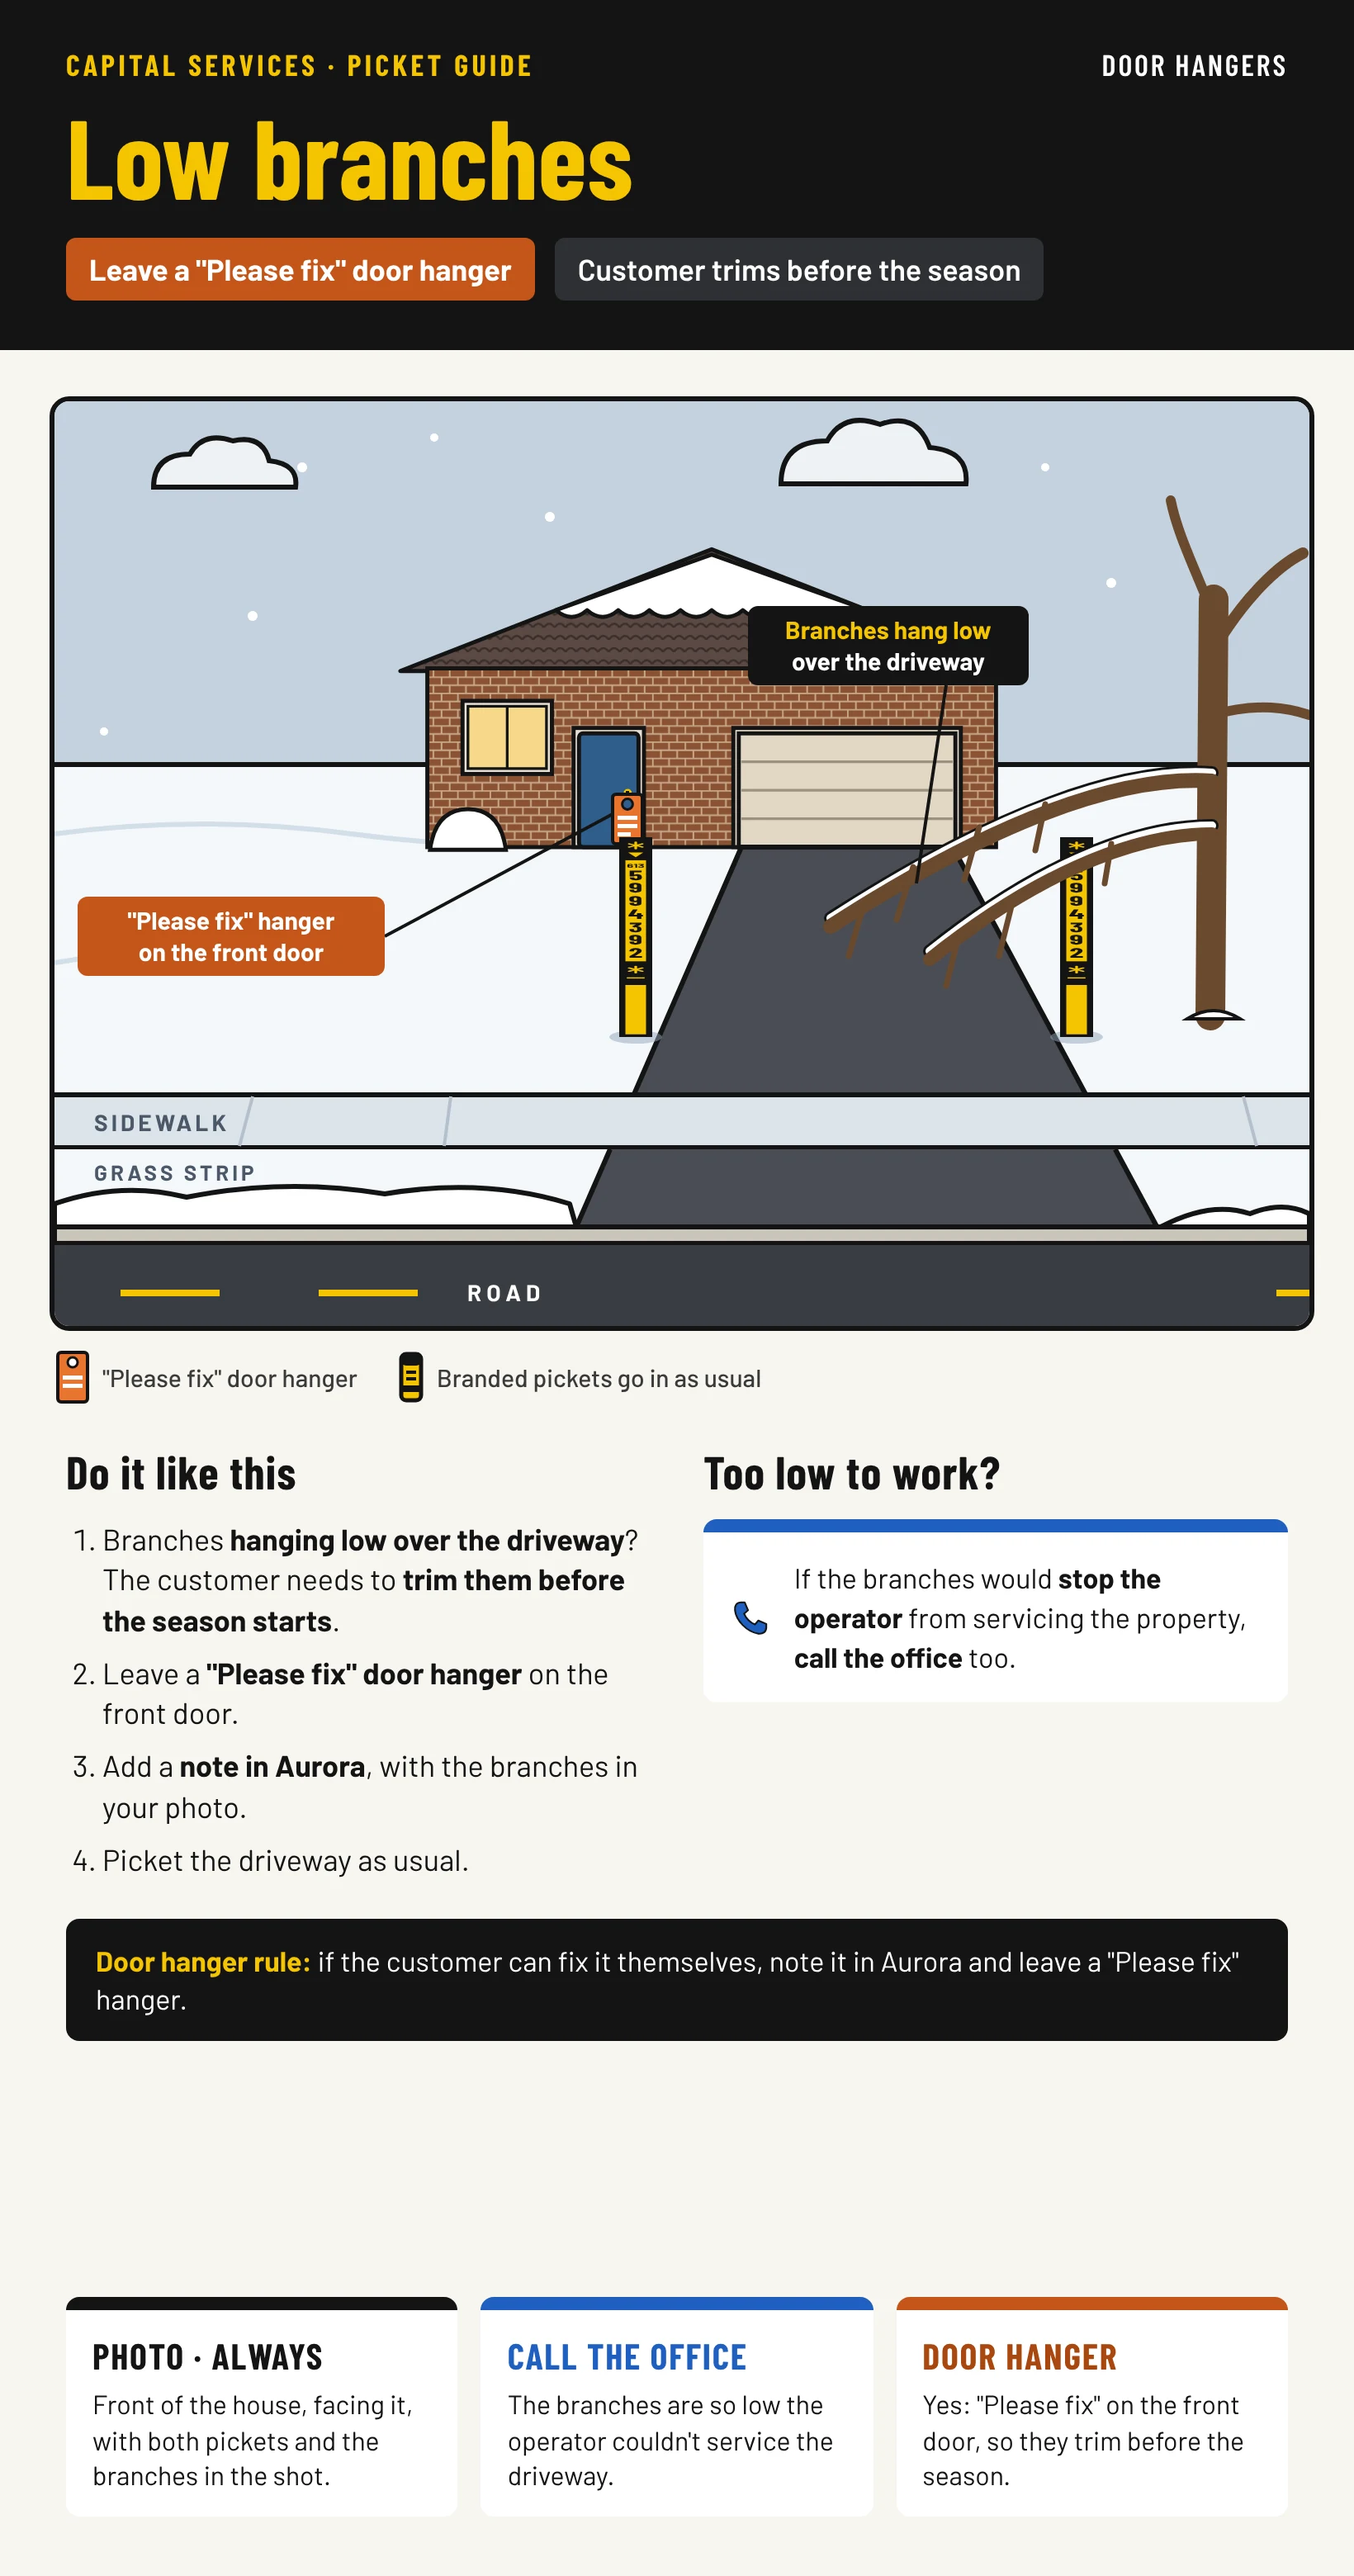
The same rules as picture cards, one scenario per card. Tap a card to open it full size.